This content is viewable by Everyone
Upgrading Pulse Secure to Ivanti Secure Access on UCSF-managed Macs
- Service Category: Business Applications
- Owner Team: IT Desktop Engineering
-
Service:ITFS Supported Macs
These instructions only apply to Macs at UCSF that are enrolled in UCSF's Jamf Pro to upgrade our installed VPN software from Pulse Secure to Ivanti Secure Access.
To begin:
Click here to be directed to the Jamf Self Service app on your UCSF-managed Mac.
(If nothing happens, click here to view our other set of instructions on how to download and run the software installer manually.)
- If this dialog shows up, click Allow.

- Log in to Self Service with your UCSF network account's username and password.
(NOTE: This is not your UCSF email address. It's your UCSF AD username such as JDoe or SmithJ.)
- Review the information presented, then click Run when you're ready to run the upgrade to Ivanti Secure Access.
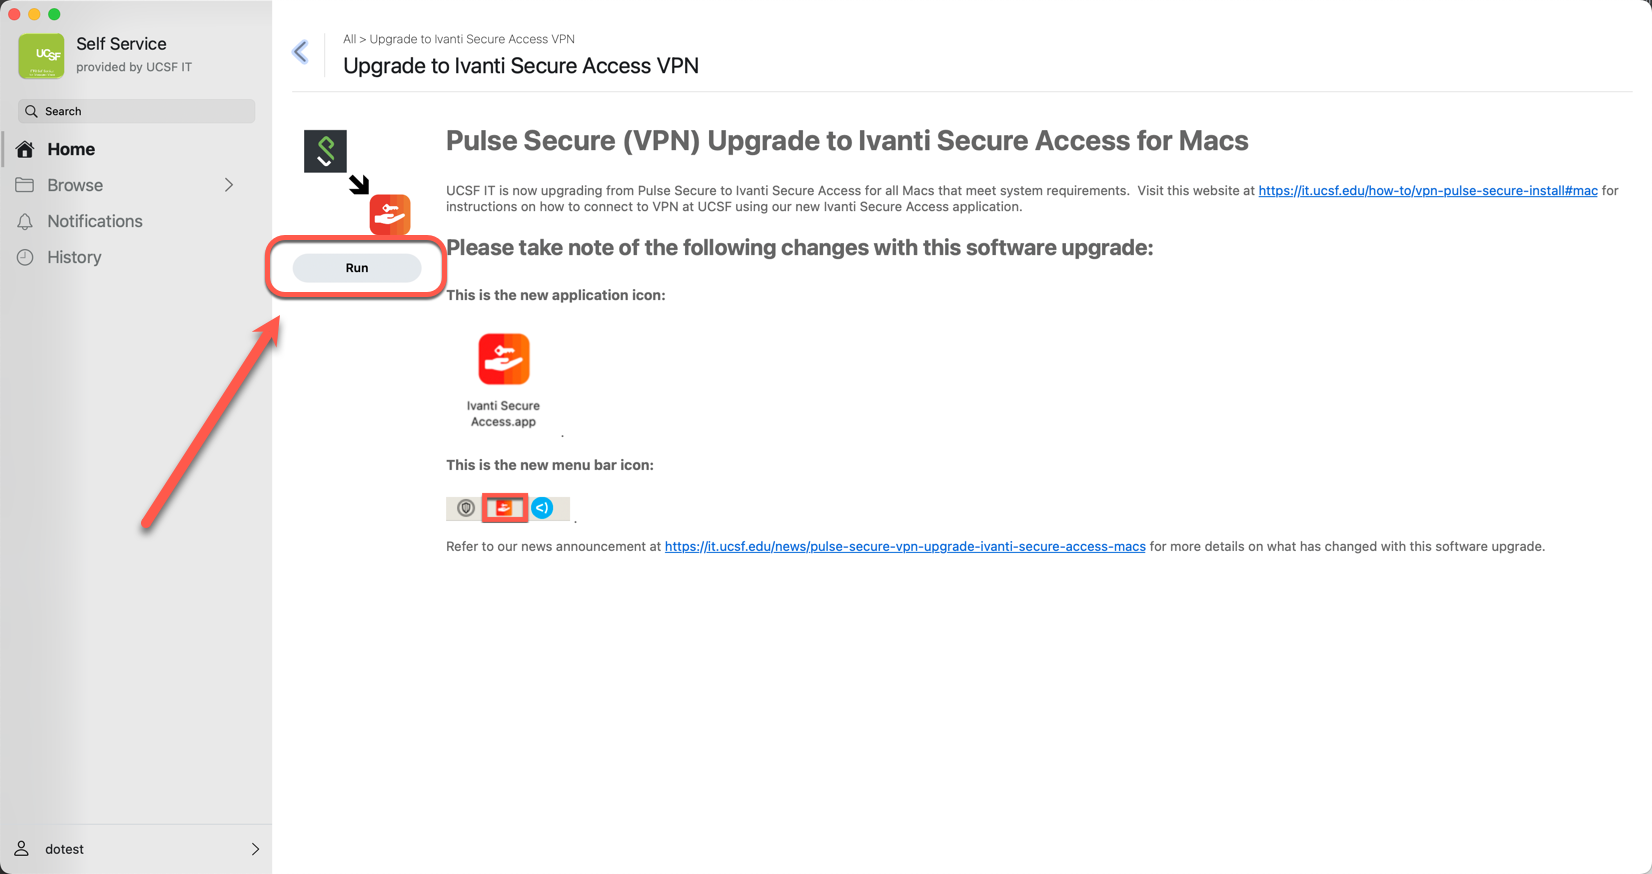
- When the upgrade is successful, you should see this icon shown near the top-right corner on the menu bar. If not, restart your computer to help clear out any pending processes associated with this software upgrade.

- Refer to our official instructions at https://it.ucsf.edu/how-to/vpn-pulse-secure-install#mac for steps on how to connect to VPN at UCSF using our new Ivanti Secure Access application.