University of California San Francisco Give to UCSF

UCSF IT Technology

Main navigation

  • Status
    • Security Announcements
  • Services
    • Projects
  • How To
  • News & Events
  • About Us
  • Log In
Open Close Search
Open menu
Give to UCSF

Breadcrumb

  1. Home
  2. How To
  3. Sign With DocuSign

This content is viewable by Everyone

Sign with DocuSign

Save

Log in via MyAccess to save.

  • Audience: Affiliate, Faculty, Staff
  • Service Category: Business Applications
  • Service:
    Electronic Signature: DocuSign

Steps to follow

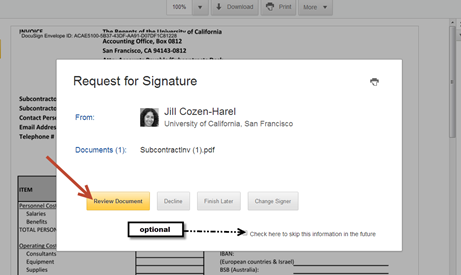
  1. Click on the Request for Signature email link to view the document.
  2. Click on Review Document. 
  3. Click checkbox if you don’t want to see the pop-up in the future. screenshot
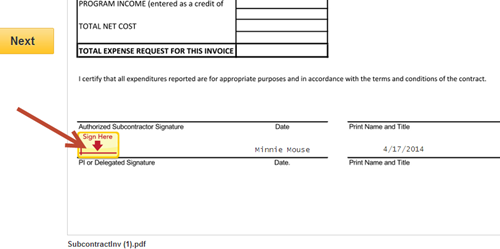
  4. Review the document.
  5. Click on the yellow Sign Here tab to sign.

screenshot

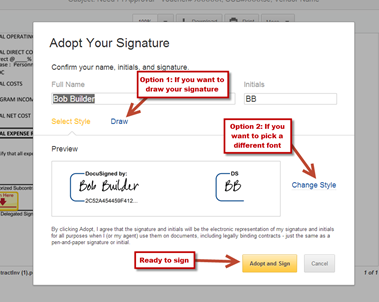
       6. Create a signature (only needed this first time signing).  

screenshot

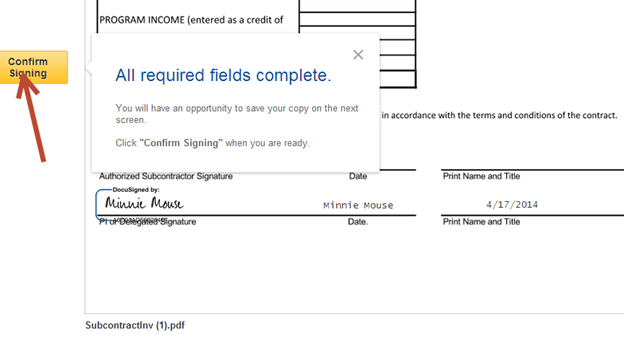
      7. Click on the yellow Next tab to scroll to the next field to sign, initial or fill out (if applicable).

      8. When all fields are filled out, you will see a pop-up indicating that all fields are complete.  

      9. Click the yellow Confirm Signing button to confirm and send.  

screenshot

Section Menu
Electronic Signature: DocuSign
  • Track DocuSign Routing
  • Respond as a DocuSign Recipient
  • Set Up a DocuSign Workflow
Home

Footer Col 1

  • Status
  • Services
  • How To
  • News & Events

Footer Col 2

  • About
  • IT Directory
  • Standards & Guidelines

Footer Col 3

  • Get Help
  • Recognize IT Staff
  • Submit a Support Inquiry

    For emergencies and high priority issues please call the IT Service Desk (415) 514-4100

    • Facebook
    • Twitter
    • YouTube
    • Instagram

    © 2025 The Regents of the University of California