What you need to know
The following are helpful tutorials on the basic functionality you will encounter as a recipient of a DocuSign envelope:
Creating a signature
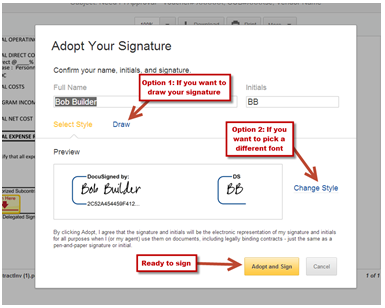
Creating and editing a signature: You will be prompted to create a signature when you sign a document for the first time. You can either select one of DocuSign’s existing fonts, which will create a signature for you; draw one with your mouse; upload a scanned version of your signature; or log in with your phone or tablet and draw it with your finger.
This will become your unique identifier – it will be on any document that asks for your signature. You can change it, later on, by going to Preferences in the top right corner of the DocuSign screen, then selecting Manage Identity in the left-hand column and then selecting Edit.
Free-form signing vs. tagged signing
Depending on how the sender decided to prepare the envelope, you will either be signing into tagged fields or given the flexibility to drag and drop your own signature, initials and other friends onto the document. As a signer, you do not have the ability to toggle between these options.
If your document has free-form signing, you will see a list of tags to drag and drop on the right-hand side of the screen. Place them anywhere on the document and then click the yellow Finish button when done.
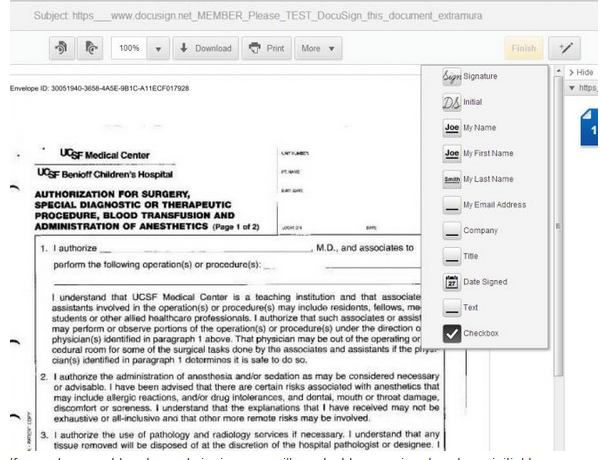
If your document has tagged signing, you will see text boxes, signature tags, initial tags and perhaps other fields for you to complete.
Tracking
Tracking an envelope's status: When you receive a document to be signed, the email notification only shows the name of the initial sender. If, for example, you are number 3 out of 6 in the routing order, the name of the sender in the email notification is the initial sender, not the person who was number 2 in the routing order.
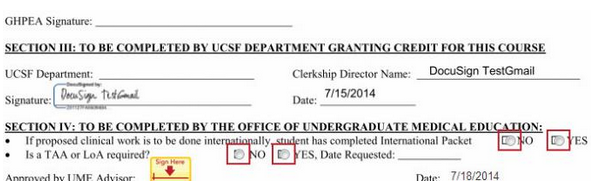
Signing
- Click on the link in the email to view the document.
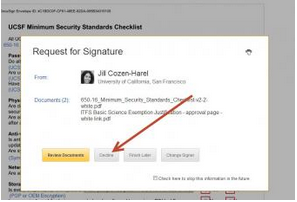
Click on Review Document. Click the checkbox if you don’t want to see the pop-up in the future.
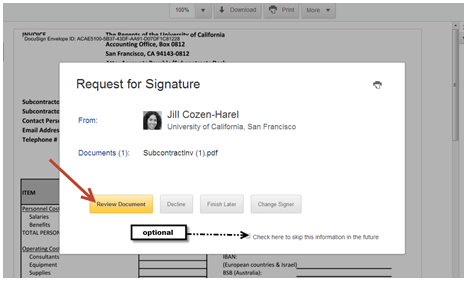
- Review the document.
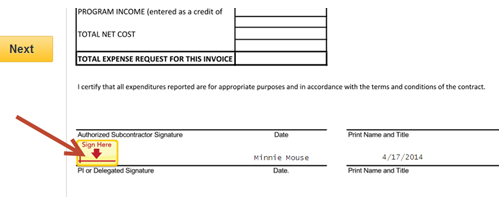
Click on the yellow Sign Here tab to sign.
Create a signature (first time signing only). Learn more about creating a signature.
- Click on the yellow Next tab to scroll to the next field to sign, initial or fill out (if applicable).
When all fields are filled out, you will see a pop-up indicating that all fields are complete.

- Click the yellow Confirm signing button to confirm and send.
Editing (markup) FAQ
When I am sending an envelope, how do I make sure that my recipient(s) can edit the document if they need to do so?
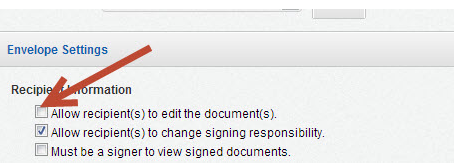
When you're preparing to send the envelope, scroll to Envelope Settings towards the bottom of the screen and make sure that the box is checked for Allow recipient(s) to edit the document(s).
- If you are using a template and do not see this option, the person who created that template did not enable it on the template level. Check in with the template owner to see if that was intentional or if the owner might be able to change that setting.
Can recipients also make changes to the document if they notice an error or omission?
- Yes, but only if the sender enabled that option when the envelope was created and sent. This option is a check box under Envelope Settings on the sending screen.
- If the sender didn't do that and you still want to make changes, contact the sender directly and ask him or her to correct the envelope and enable that feature (see below).
- Note that all signers on the document – regardless of whether they are earlier or later in the workflow than the person who marked the document – will need to initial the changes. Even if you are not a signer, you will receive a note in the Completion Notification email which informs you that changes have been made.
Learn more step-by-step instructions to edit the document text by using the DocuSign Markup tool.
Declining
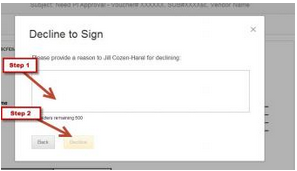
To decline to sign a document, you can take one of two actions:
(1) Click Decline from the initial pop-up screen.
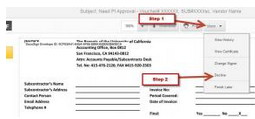
(2) Click Decline from the More drop-down menu.
The third and last step is to provide a reason for why you are declining to sign.
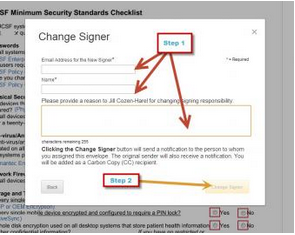
Changing signer
To reassign the signer to someone else, follow these steps.
(1) After clicking through the link to sign in to your email notification, click on the Change Signer button on the pop-up.

(2) Fill in the new signer's email address and name as well as the reason that you are changing signers. Once you complete this pop-up form and press Change Signer, you will become a cc recipient on the envelope, and the new signer will receive an email notification explaining that you are appointing him or her as the new signer of this document. All tags that were originally assigned to you will be assigned to the new signer.