This content is viewable by Everyone
Cisco Jabber UC Training: Video Conference
- Audience: Faculty, Staff, Student
- Service Category: Phones & Pager
- Owner Team: IT DWS Unified Comms
-
Service:Cisco Jabber UC
Starting a Video Conference in Cisco Jabber UC
To start a video conference call, you will need to either (1) join one of our on-premise video conferencing bridges or (2) know the conference room's SIP URI so that you can dial the room directly.
Note: The on-premise bridges and the conference room URIs look like email addresses. They must end in @ucsf.edu in order for Jabber UC to route the call to the video conference infrastructure.
To initiate the video conference call:
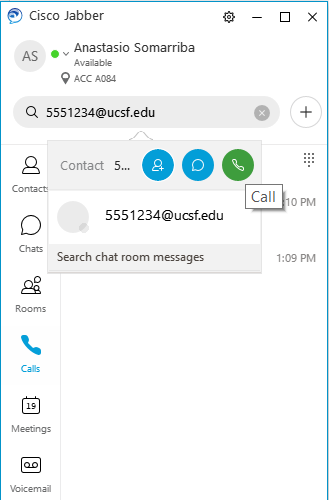
- In the search bar of the Jabber client, enter the bridge number or SIP URI, then pause and wait for a menu bar to appear (see image below).
- In the drop-down menu, click on the phone icon to start the call.
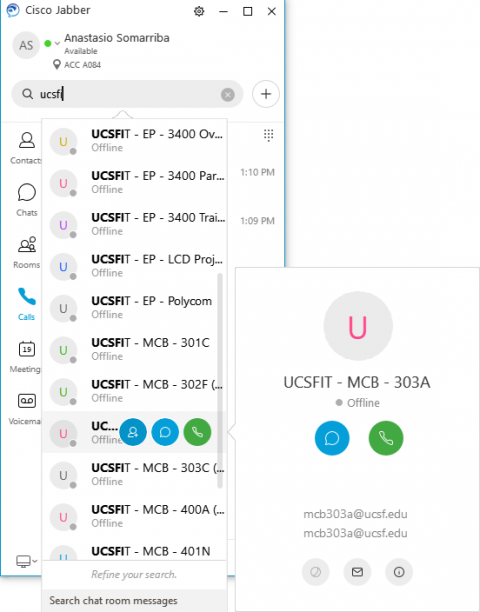
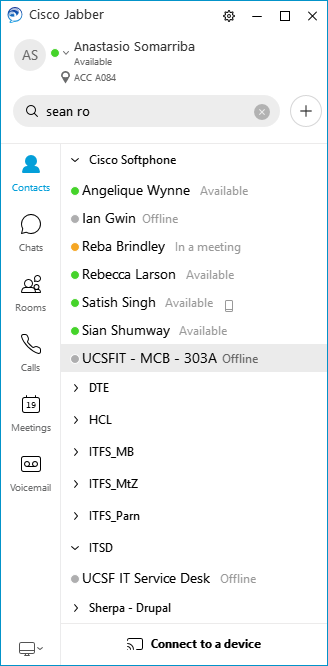
- Alternatively, if you're trying to call a conference room from your contact list, simply search the contact in the search bar, then hover over the phone icon next to the contact to start the call.
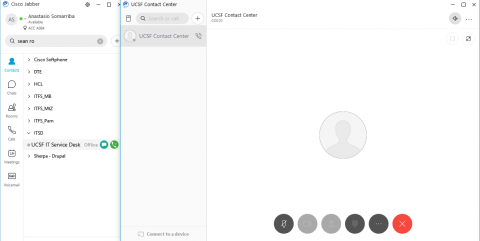
The screen below shows the status of your Jabber client when a call is connected to a video conference room or bridge.
Creating video contacts for future calls
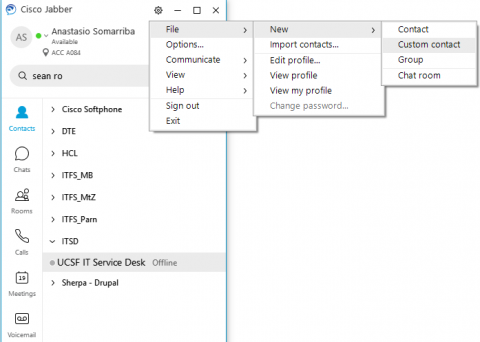
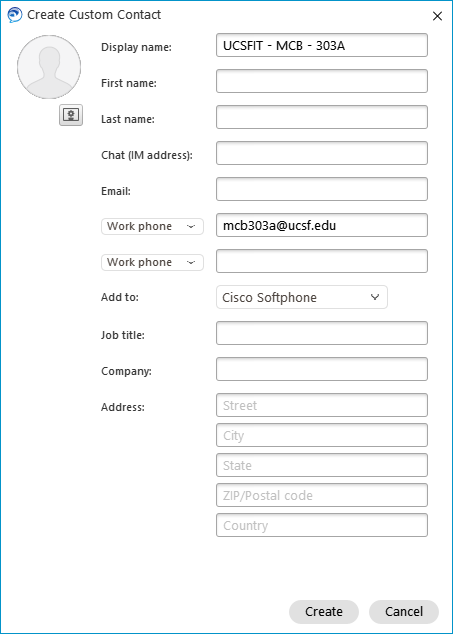
- Click on the Settings wheel (Contacts> New Custom Contact on Mac Client) on the top right of your Jabber screen, then click on File>New>Custom Contact.
- Provide a descriptive name for the custom contact.
- In Work phone (the most important field), fill in the SIP URI address.
- Choose the appropriate Add to: group (folder) where you want this contact to appear in your Jabber client.
- Click on Create.
Once you've created a custom contact, you will see it in your Contacts folder.
