The Password Management Tool provides users with the ability to complete the following processes:
NOTE: Please be sure to follow ALL of the instructions for these processes to avoid a lockout to your UCSF account.
- Enroll and log In
- Change your password
- Unlock your account
- Update your security questions
- Register your mobile device
NOTE: If you are registering your mobile device, you will need to Enroll the Mobile Device in Intune Company Portal.
Best Practice: When changing your password, you should have all of the devices used to access UCSF systems (including WiFi) and applications in one place and change your password for each. Also, you should think of the places (e.g. Software and Systems) that you use as you may need to update your password in those systems as well. Learn more about best practices for changing your password.
Enroll and log in
NOTE: Be sure to follow these instructions step-by-step to avoid a lockout to your UCSF Account.
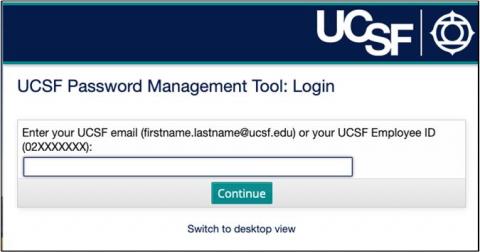
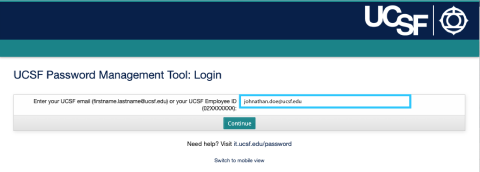
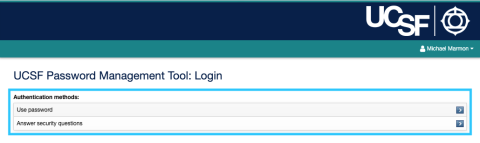
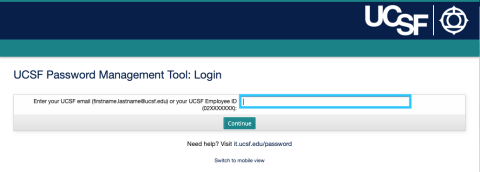
- Go to the UCSF Password Management Tool. Enter either your 9-digit UCSF ID number (02xxxxxxx) or your UCSF email address.
- Create six security questions and answers to authenticate your account and enroll in the tool.
- Your enrollment is successful if you are directed to the main menu and receive the message, “All enrollment tasks are complete. Download and register for the mobile app to easily unlock your account from your phone in case you are locked out."
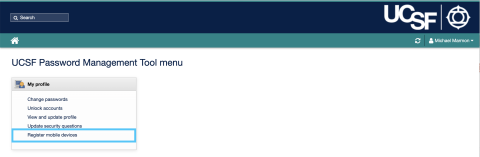
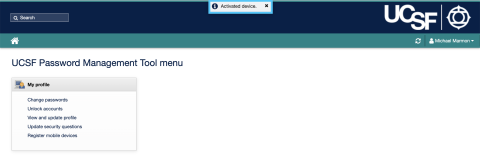
- From the main menu, you have the ability to:
- Change your password
- Unlock your account
- Update your security questions
- Register your mobile device(s)
Change your password
NOTE: Be sure to follow these instructions step-by-step to avoid a lockout to your UCSF Account.
Before you change your password, we recommend that you stop all of your devices from connecting to UCSF resources (Including WIFI) linked to your account; this will help to prevent getting locked out of your account.
NOTE: After changing your password, be sure to update your password in your device's settings if used to access the UCSF WIFI network to avoid potential account lockouts. Learn more about Updating your password to access the UCSF WIFI networks
- Go to the UCSF Password Management Tool. Enter either your 9-digit UCSF ID number (02xxxxxxx) or your UCSF email address.
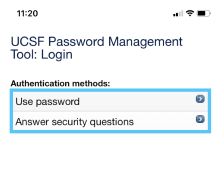
- Log in with your password or answer your security questions.
- From the main menu, click the Change passwords button.

- Click the checkbox(es) next to the account(s) for which you want to update your password. You can use the suggested password or create one.
NOTE: You must meet the minimum requirements to save your password. UCSF policy forces unique passwords for each account. It is also a best practice to review the last date that your AD account passwords were changed and update them accordingly. Learn more about UCSF password requirements.
- Enter your new password, confirm it and click the Change passwords button.

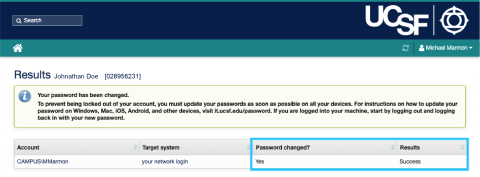
- After your new password has been saved, you will be taken to a Confirmation screen stating that your password has been changed.
NOTE: You will also receive a confirmation email that your password has changed as well.
- Important: Log out of your computer (or Lock your computer) and then log back in using your new password.
- Remember to immediately update your password on all your other devices for Wi-Fi, UCSF email and any necessary apps.
Unlock your account
NOTE: Be sure to follow these instructions step-by-step to successfully unlock your UCSF Account.
When you enter the wrong password too many times, your account will be locked out. You can use the UCSF Password Management Tool to unlock your account(s).
- Go to the UCSF Password Management Tool. Enter either your 9-digit UCSF ID number (02xxxxxxx) or your UCSF email address.

- Log in with your password or answer your security questions.

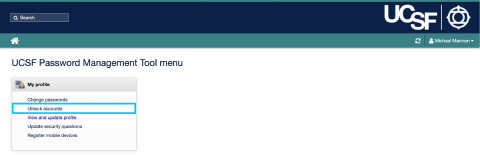
- From the main menu, select the Unlock Accounts button.
- Check the box next to the account(s) you want to unlock, and click the Unlock button.

- You will receive a notification that your account was successfully unlocked.

NOTE: Once you have updated your network password, you should do the following:
Sign in to all your mobile devices as soon as possible
Use your new password to sign in to Wi-Fi and mobile email apps
This will help prevent getting locked out of your account
Update your security questions
NOTE: Be sure to follow these instructions step-by-step to successfully configure security questions for your UCSF Account.
You can update your security questions, answers or both at any time.
- Go to the UCSF Password Management Tool. Enter either your 9-digit UCSF ID number (02xxxxxxx) or your UCSF email address.
- Log in with your password or answer your security questions.
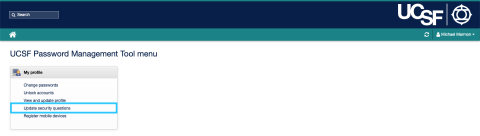
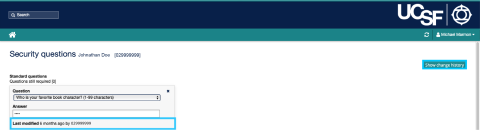
- From the main menu, click the Update security questions button.
- From the Security questions page, you have the ability to change your password for one or all of your associated accounts at once.
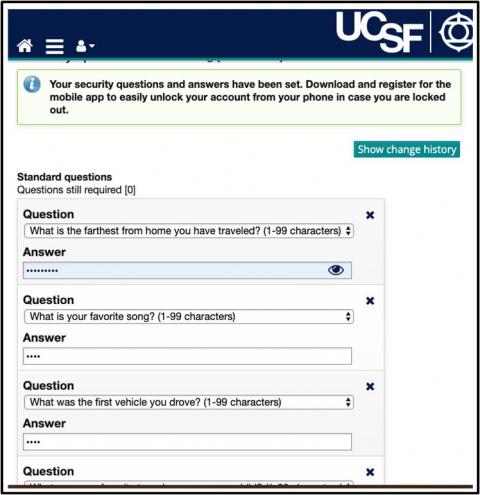
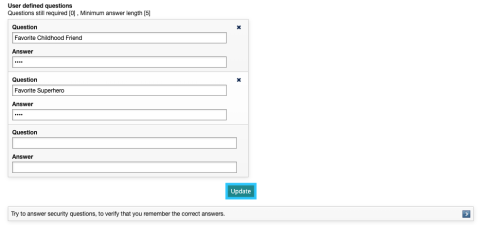
- Choose the question, answer or both that you want to edit. Make your change(s). NOTE: You can delete questions by selecting the X next to the question. If you remove any questions, you will be prompted to add another if you do not meet the minimum number of standard (5) and user-defined questions (2).

- Check for any typos in your answers by clicking and holding down the Reveal answers button before saving your changes.

- Click Update to save your changes.
- NOTE: You can also view previous changes to your security questions by clicking the Show change history button and then clicking on the plus (+) sign next to each security question.
Register your mobile device
NOTE: Be sure to follow these instructions step-by-step to register your mobile device as a means to change your password or unlock your UCSF account.
The UCSF Password Management Tool is only available when you are on the UCSF network. To help you manage your account(s) on the go, you will need to download the Hitachi ID Bravura One app for Android or iOS.
NOTE: To successfully complete the registration process, you should download the Hitachi ID Bravura One mobile app on your device before starting the registration process.
You need to register your device once with the tool in order to use the mobile app. Follow these instructions after you've installed the mobile app on your Android or iOS device.
NOTE: The session will time out if not completed in the allotted time. Be sure to set aside enough time to complete this process without pause.
- Go to the UCSF Password Management Tool. Enter either your 9-digit UCSF ID number (02xxxxxxx) or your UCSF email address.
- Log in with your password or answer your security questions.

- On the main menu, select Register mobile devices.
- Click the Register button to begin the device registration process.
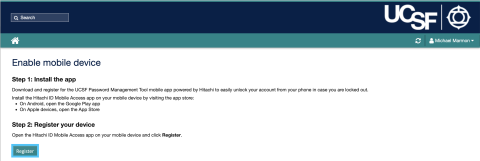
- The Activate Mobile Device screen will load with a QR code. NOTE: You should have the Hitachi id Bravura Oneapp installed on your device as you will need it to scan this QR code in later steps.

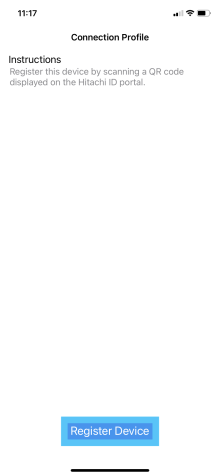
- Launch the mobile app on your phone or tablet and select Register Device.
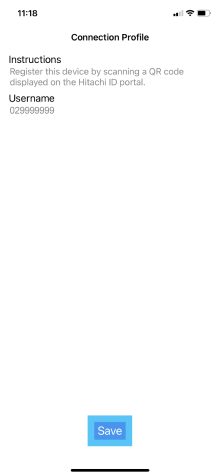
- Grant the app access to your camera, then aim the camera at your computer's screen to scan the QR code. The app will recognize the QR code and display your UCSF employee ID on your phone.
- If the employee ID is correct, click Save.
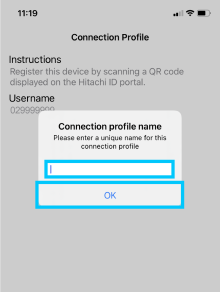
- Enter a Connection Profile Name and then click the OK button.
- The UCSF Password Management Tool: Login screen will load on your device.

- On your computer screen, you will receive a message stating Activated Device.
- After clicking OK in the dialog window on your computer, the mobile app will load the main menu where you can reset your password or unlock your account(s), just like the desktop version of the tool.