Try using Jamf Pro first
Mac computers used for UCSF business or study can enroll into Jamf Pro to manage encryption and facilitate compliance with the UCSF Minimum Security Standards (http://tiny.ucsf.edu/mss/) . Jamf Pro is the recommended solution for encryption management on Macs used for UCSF work or study, and is provided at no charge to the UCSF community.
Instructions for enrolling a Mac with Jamf Pro are available at https://it.ucsf.edu/how-to/ucsf-jamf-pro-byod-macs (MyAccess login required).
If you cannot use Jamf Pro, use the Proof of Encryption form and a FileVault Recovery Key
If a Mac cannot use UCSF's Jamf Pro, the Proof of Encryption form can be used to provide evidence of encryption and also escrow an FileVault Recovery Key with UCSF.
In some cases, you may not have a FileVault Recovery Key because macOS will allow you to use your iCloud login to unlock your Mac, but this does not satisfy the Proof of Encryption requirements as part of UCSF and UC policy.
UCSF does not want or need your iCloud password - a Recovery Key is a code specific for encryption on your Mac and does not allow access to your iCloud account.
If you have already enabled FileVault disk encryption with an iCloud account as the recovery option, you will need to decrypt and re-encrypt your Mac's disk(s) to use a FileVault Recovery Key. While the risk of issues is generally low, you should have a recent backup of your data before proceeding in case something goes wrong.
Part 1: Decrypting FileVault
- Choose Apple menu > System Preferences, then click Security & Privacy.
- Click the FileVault tab.
- Click the lock 🔒 icon in the bottom left, then enter an administrator name and password.
- Click "Turn Off FileVault".
Decryption will proceed in the background as you use your Mac, and only while your Mac is awake and plugged in to AC power. You can check progress in System Preferences > Security & Privacy > FileVault .
You can also keep your Mac awake during decryption and re-encryption to let it keep progressing while unattended. You can revert these settings after you've re-encrypted your Mac.
- Choose Apple menu > System Preferences, then click "Energy Saver" or "Battery".
- Click "Power Adapter"
- Enable the checkbox for "Prevent your Mac from automatically sleeping when the display is off"
- Uncheck the checkbox for "Put hard disks to sleep when possible" if this setting is available.
Ensure your Mac is in a physically secure place during decryption and re-enable FileVault AS SOON AS POSSIBLE. Your data is unprotected until FileVault is re-enabled. The decryption process should take under an hour for most modern Macs.
Part 2: Encrypting FileVault with a Recovery Key
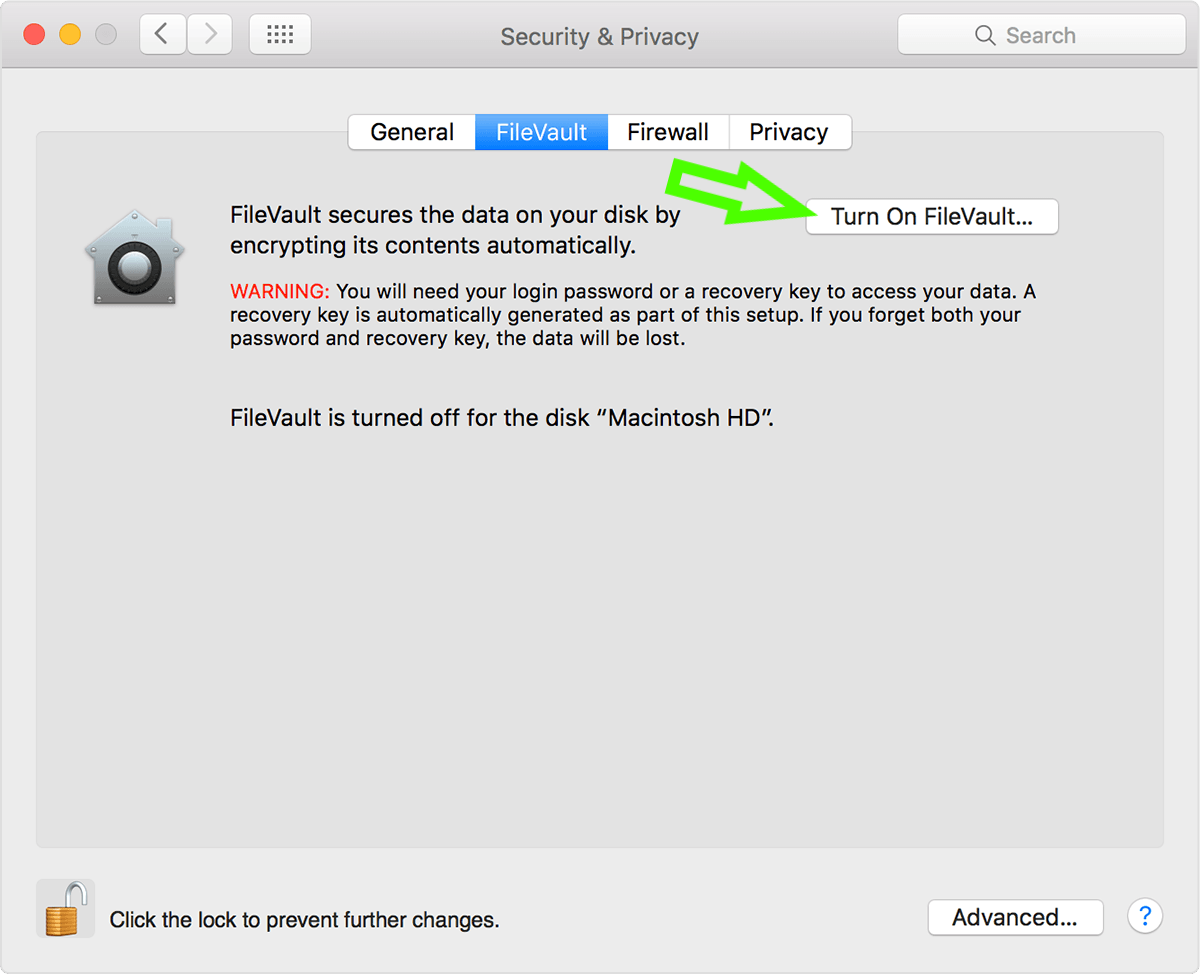
- Choose Apple menu > System Preferences, then click Security & Privacy.
- Click the FileVault tab.
- Click the lock 🔒 icon in the bottom left, then enter an administrator name and password.
- Click "Turn On FileVault".
- Choose "Create a recovery key and do not use my iCloud account" and click "Continue".
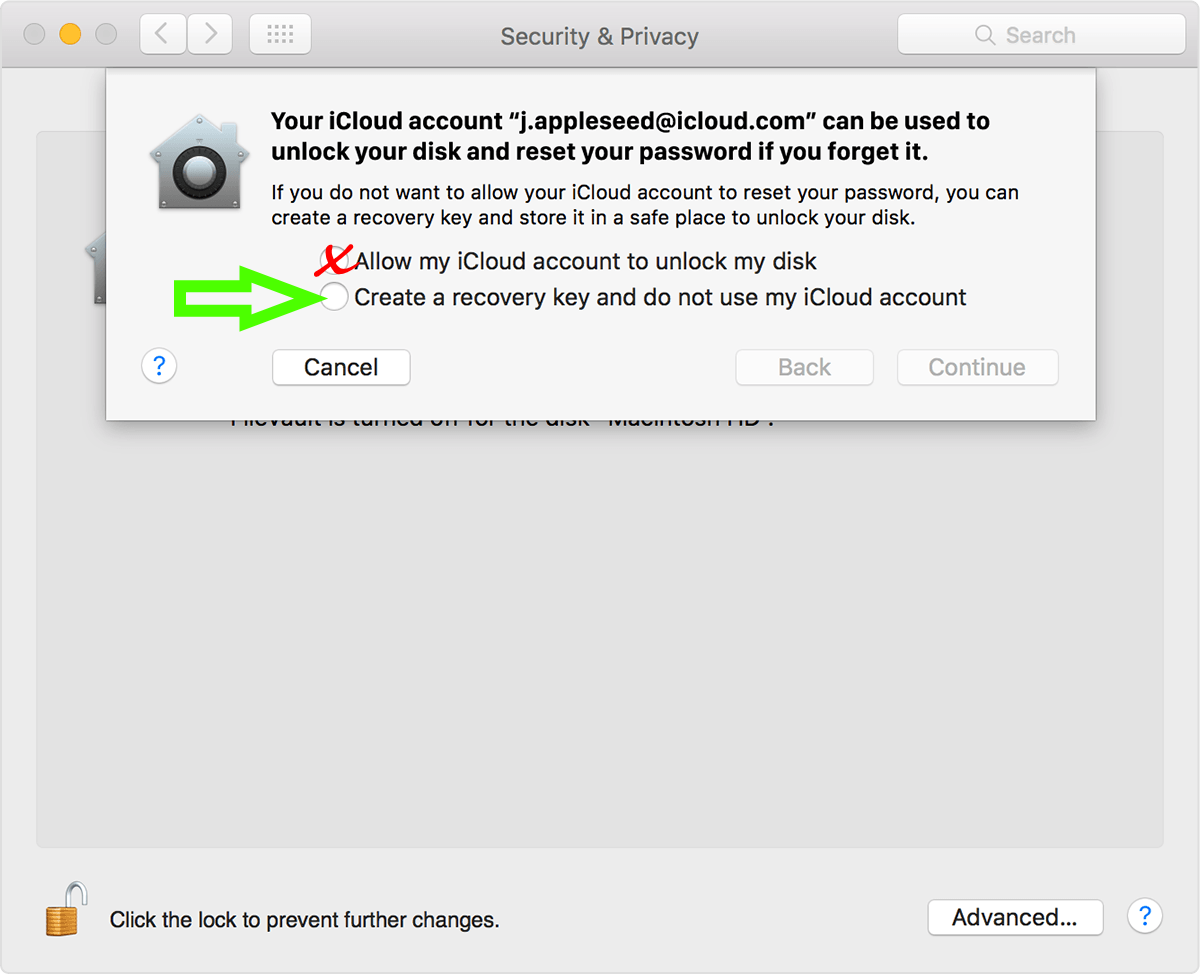
- macOS will display a string of numbers and letters - this is your Mac's FileVault Recovery Key. It is unique to your Mac and is only shown to you once. Copy this string of numbers and letters and store them in a safe place, somewhere other than on your Mac. The FileVault Recovery Key is the only way to regain access to your data if you forget your Mac login password.

Encryption will proceed in the background as you use your Mac, and only while your Mac is awake and plugged in to AC power. You can check progress in System Preferences > Security & Privacy > FileVault .
You can use the Recovery Key to submit a Proof of Encryption form