Overview
If you workstation is managed by UCSF IT, you will have the CipherCloud Agent automatically installed via BigFix (Windows) or JamfPro (Mac). For BYOD or devices not managed by UCSF IT, you can install the CipherCloud Agent via it.ucsf.edu.
Installing the CipherCloud Agent
Step1
Download the CipherCloud agent
Step2
Run the installer as an administrator.
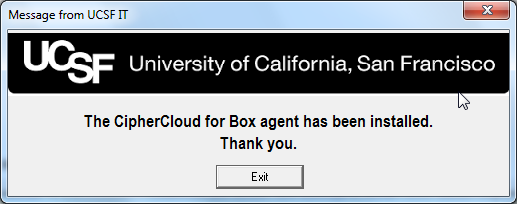
After finishing the installation process, the following message will notify you that the agent has been installed:
Step3
Once installed, the application will run passively to provide access to encrypted files.
Step4
Log into the CipherCloud agent
NOTE: The agent requires you to authenticate to Box once every 30 days (even if you are already logged into Box).
How to authenticate with the CipherCloud Agent
Step1
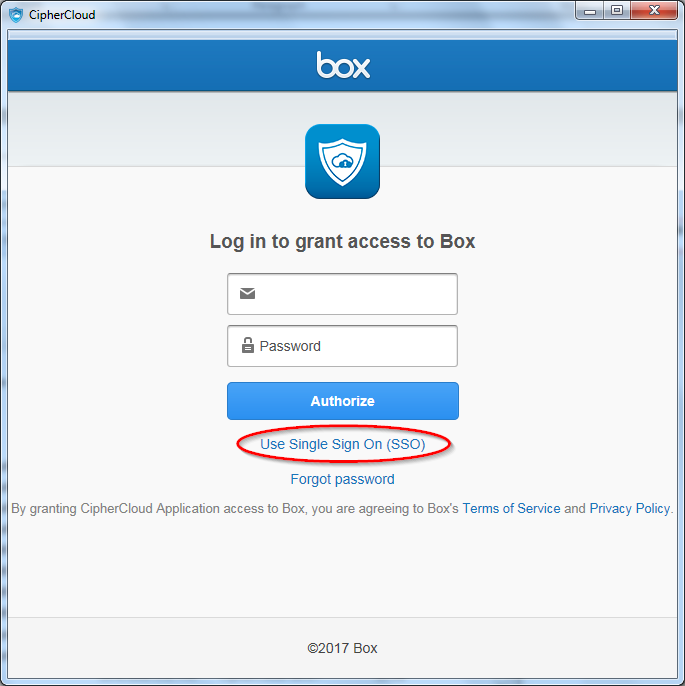
Once installed, a CipherCloud agent window will pop up.
Step2
Select Use Single Sign On (SSO) and enter your UCSF email address.
Step3
You will be directed to enter your UCSF MyAccess login: Log in with your credentials.
Step4
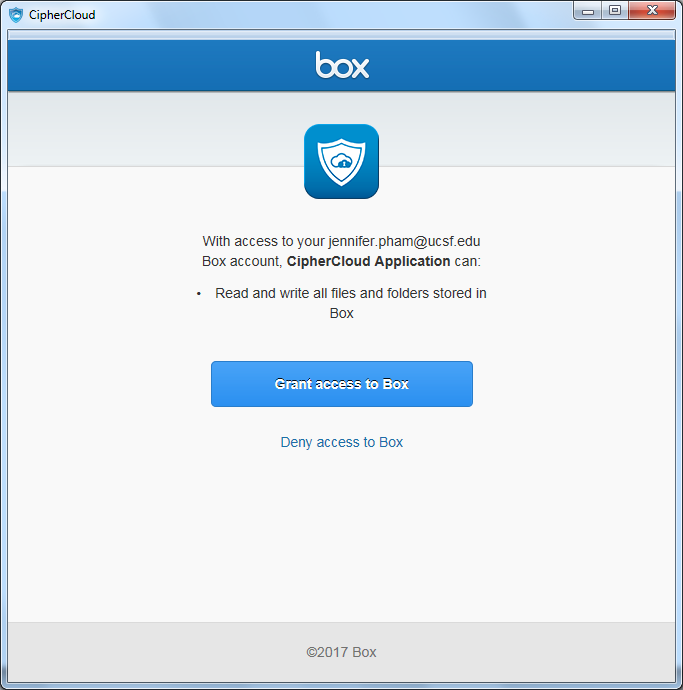
Click on Grant access to Box to complete the authorization process. Your encrypted file will open shortly.
NOTE: You will need to repeat this process every 30 days.
Service Category
Business Applications
Owner Team
Cloud Applications