Login to MyPPM via MyAccess.
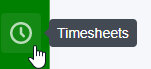
Click on the Timesheets link in the left-hand side menu.
First Time Users
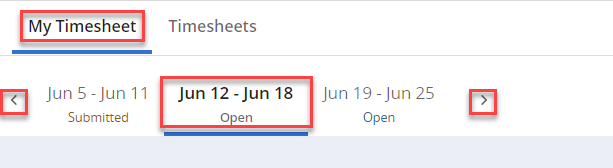
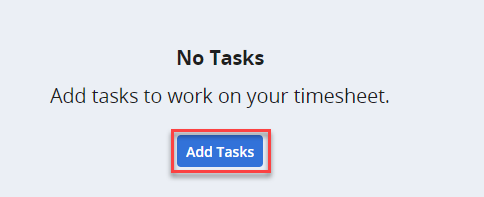
For first time users, ensure you are on the My Timesheet tab. Select the applicable week from the menu at the top. Use the left and right arrows to navigate to the correct week. Click on Add Tasks.
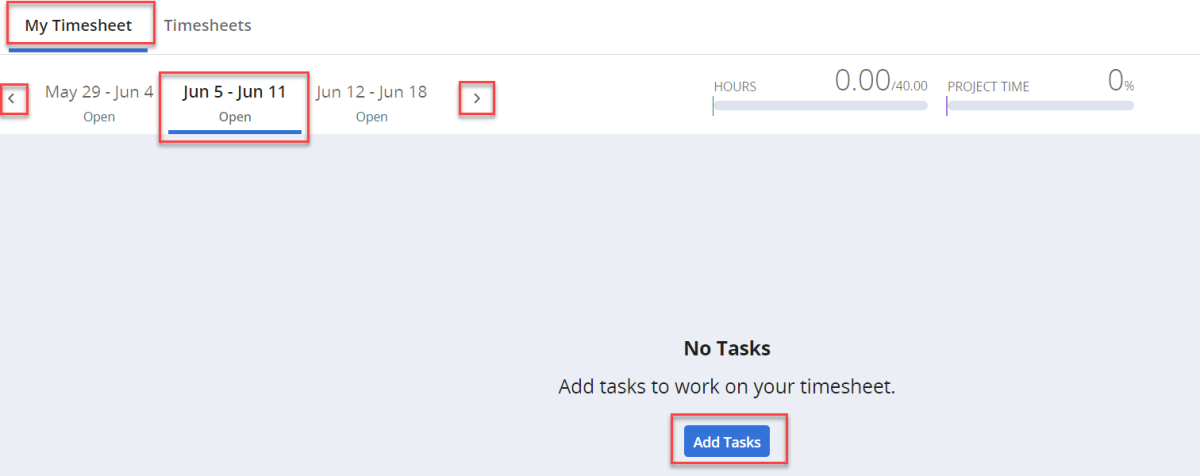
Select Add Assigned Tasks.
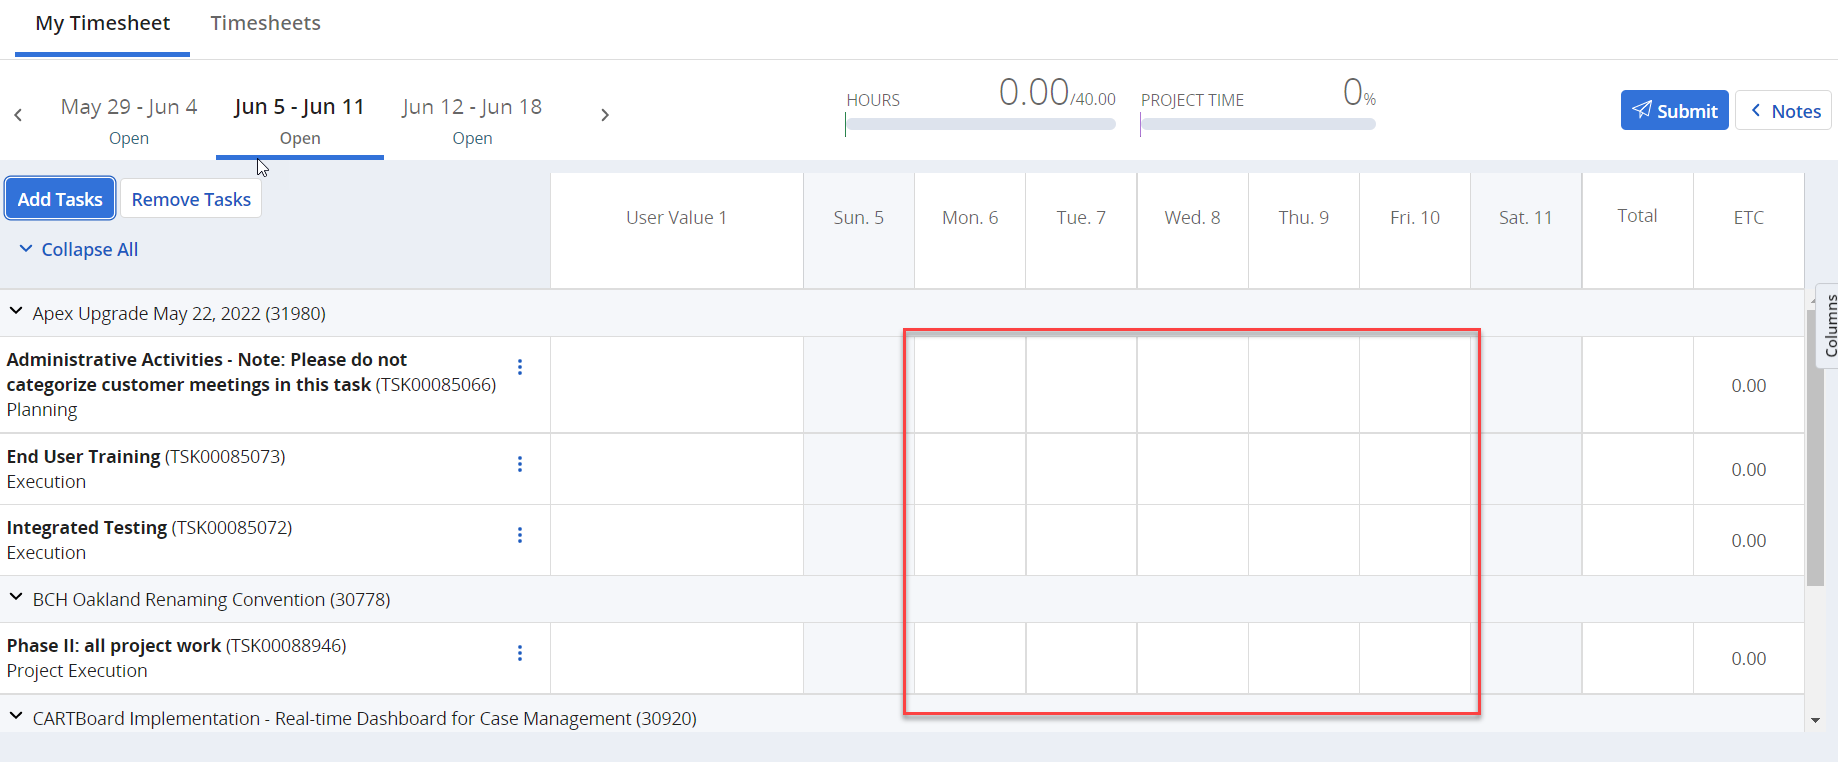
Your timesheet will now be created and all tasks you are assigned to (for the current period) will now be visible.
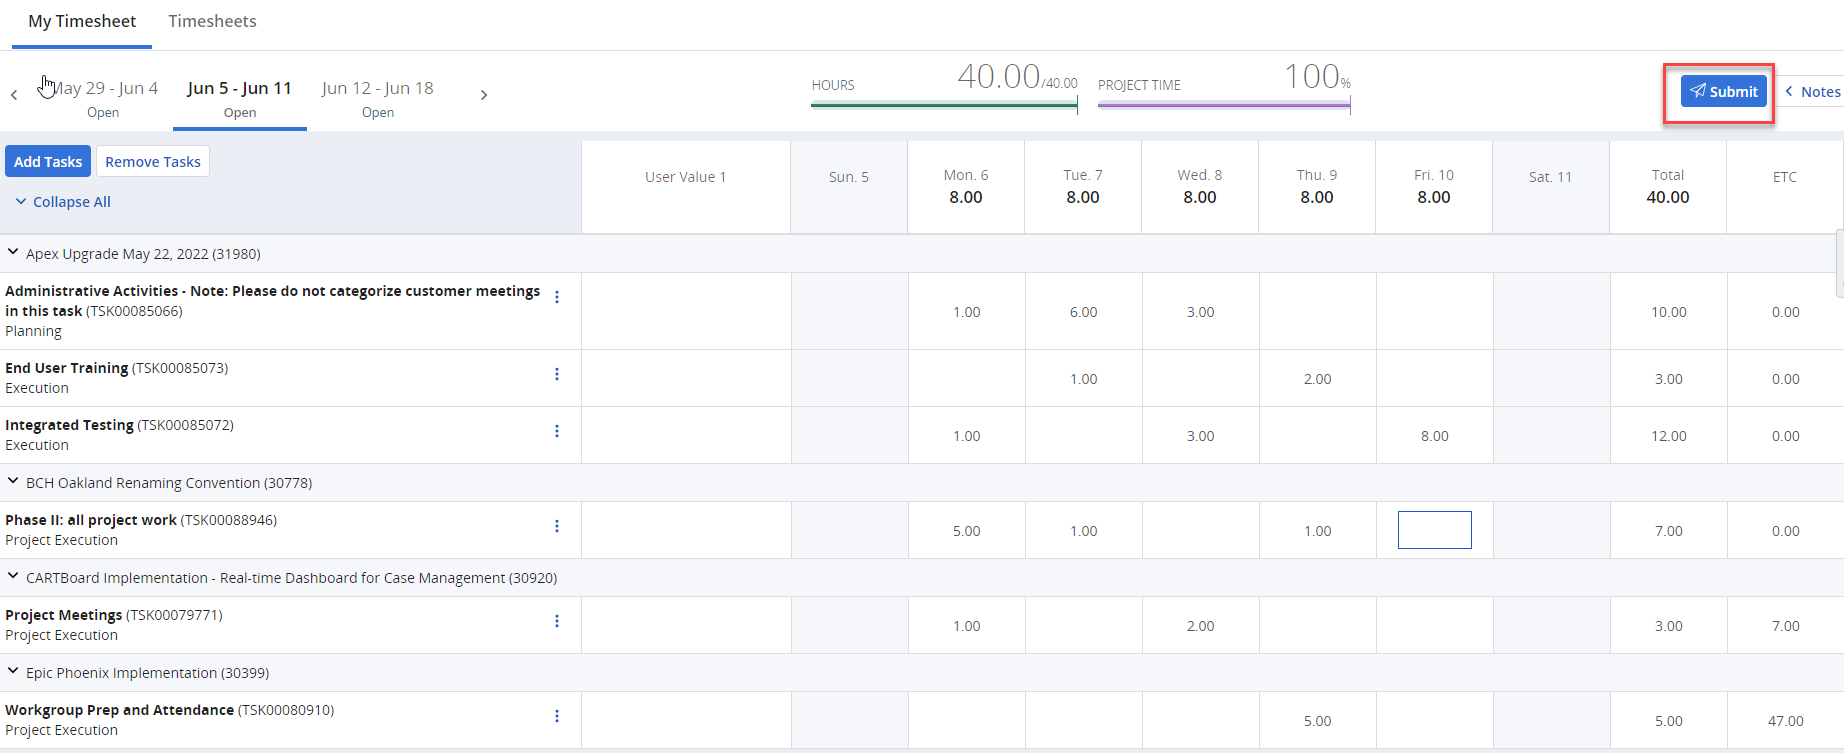
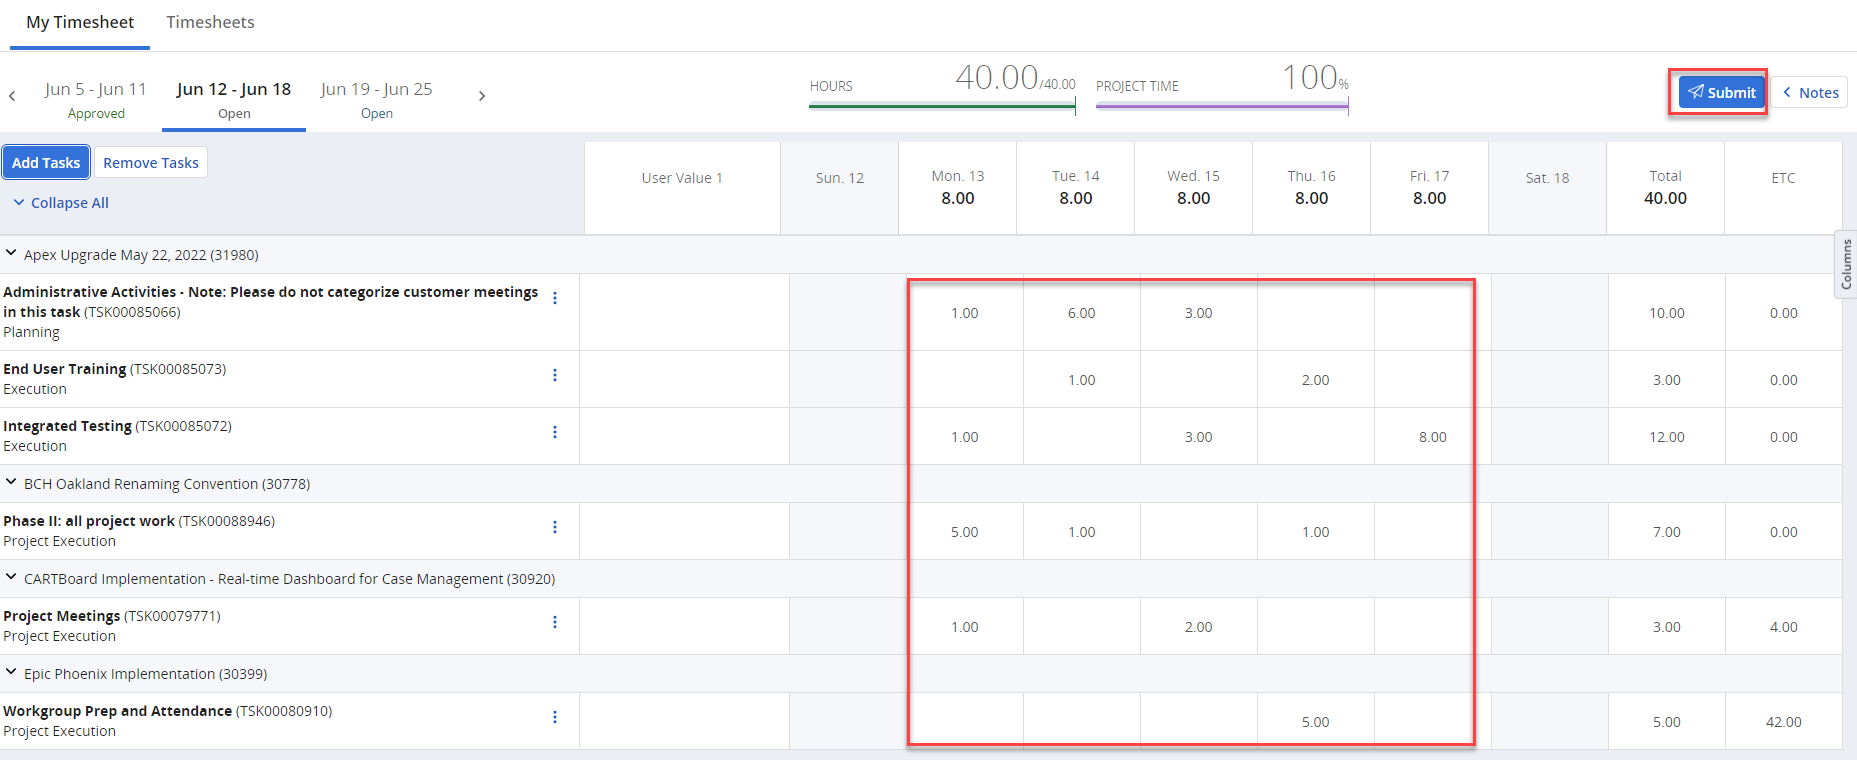
Hours may be entered for each day of the week.
**Note: Your project manager or direct line manager will assign you to the necessary tasks for the activities you are working on. If you do not see any tasks, please follow up with your resource manager or project manager.
ETC (Estimate To Complete) shows allocated hours for the task.
Once all of your hours for the week have been entered, click on the Submit button.
Non-First Time Users
Click on the Timesheets icon on the left-hand side menu.

Navigate to the applicable week on the My Timesheet tab by using the left and right arrows.
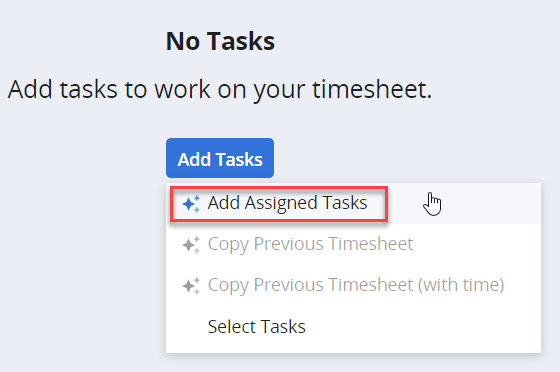
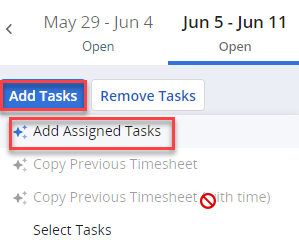
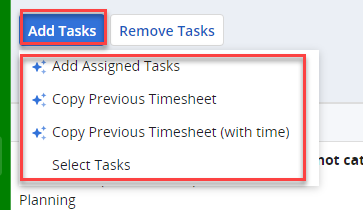
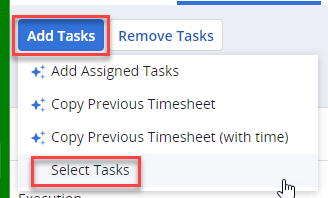
Click on Add Tasks.
You will be presented with the following options:
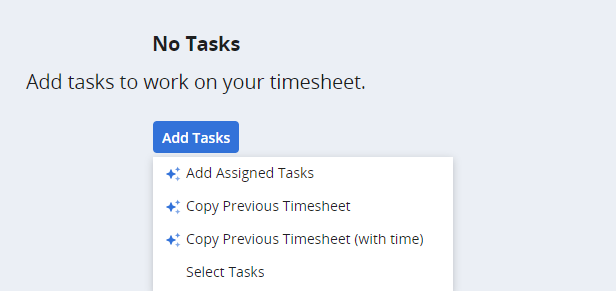
Add Assigned Tasks: This will bring across all tasks you are currently assigned to. This option will remove tasks which may have end dated, or you are no longer assigned to. This option will also add any tasks you have been recently assigned to.
Copy Previous Timesheet: This option will bring across the same set of tasks which were added to the previous timesheet period.
Copy Previous Timesheet (with time): This option will bring across the same set of tasks which were added to the previous timesheet period. It will also bring across the effort hours which were entered into the previous timesheet.
Select Tasks: This will allow you to search for other tasks, which you are not necessarily assigned to. Note: This option may not be available, if system settings are in place to restrict time entry to assigned tasks only.
Add Assigned Tasks
If you have selected one of the first three options from the previous step, the timesheet will be populated with the appropriate tasks.
Enter the effort (in hours) for the week. Once the time entry is complete, you must click on Submit.
Add Additional Assigned Tasks
If you have already created your timesheet, but you need to add additional tasks, click on Add Tasks > Add Assigned Tasks.
You will receive the following prompt.
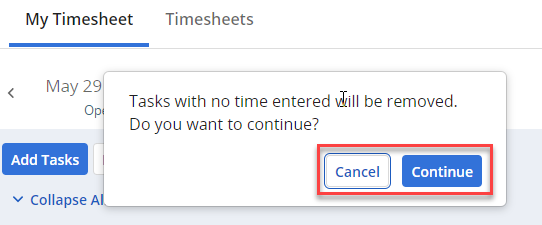
If you select Cancel, you will remain on the time entry page and no change will be made.
If you select Continue, any tasks that have no hours entered will be removed, as per the task below.

After selecting Continue, your timesheet will be updated and any new assigned tasks will be added to your timesheet.
If you have lodged time previously, you will have additional options available under Add Tasks.
Copy Previous Timesheet and Copy Previous Timesheet (with time) will perform the same function as per the earlier step in this guide.
Once you select one of these options, your timesheet will be ready for time entry.
Add Non-Assigned Tasks
If the task you are looking for does not drop into your timesheet when using one of the above options, you may search for specific tasks to add them to your timesheet.
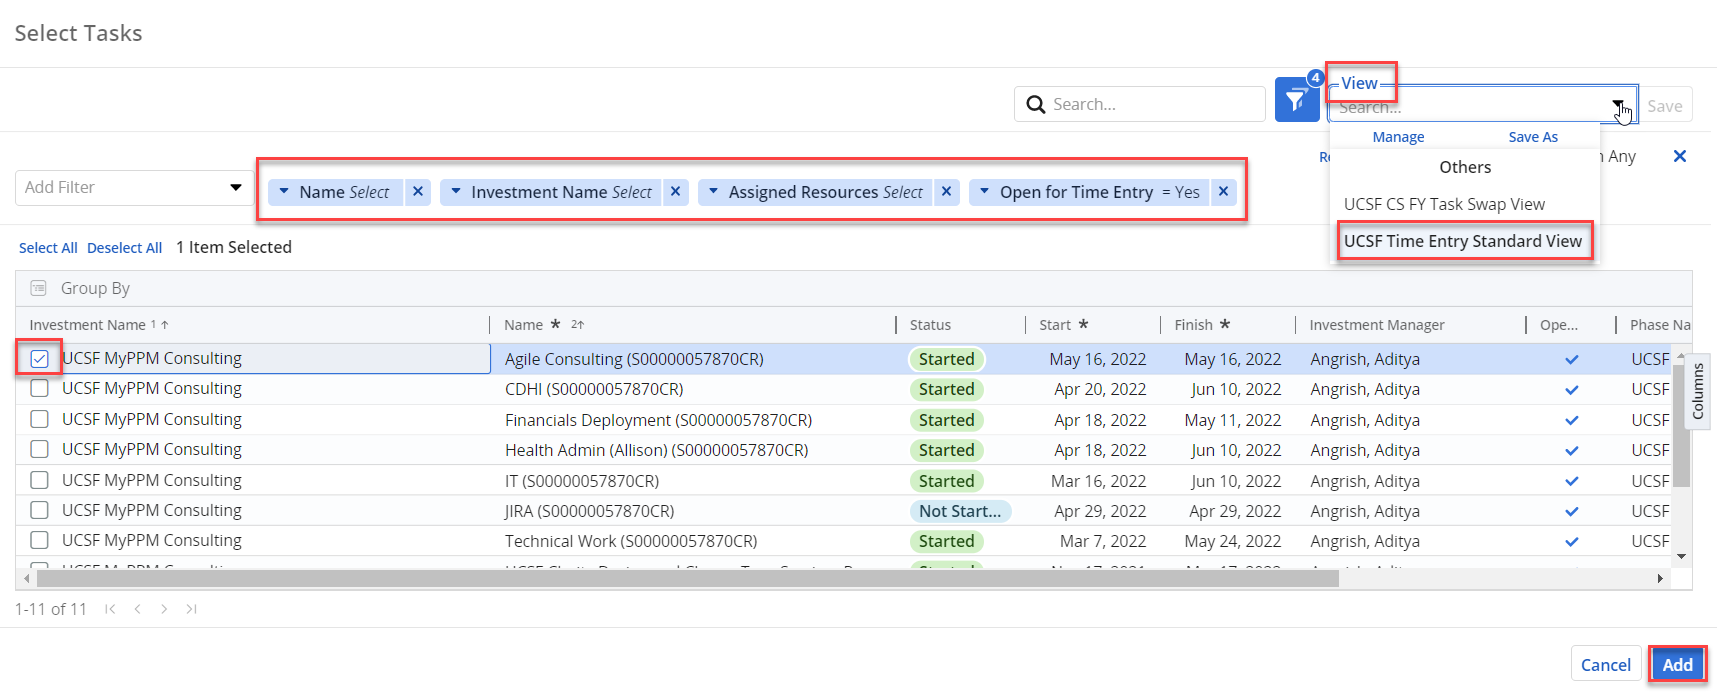
From your timesheet click on Add Tasks > Select Tasks.
You will be given the option to search for tasks, with the use of the standard system filter option.
For your ease of reference, we have created a View called UCSF Time Entry Standard View, which can be found in the View section in the top right-hand corner.
Name: Allows you to select the Task name.
Investment Name: Allows you to search for the project you have been working on.
Assigned Resources: If searching for non-assigned tasks, click the x to remove this filter option.
Open for Time Entry: This will default to Yes.
Check the box beside the appropriate tasks and click on Add.
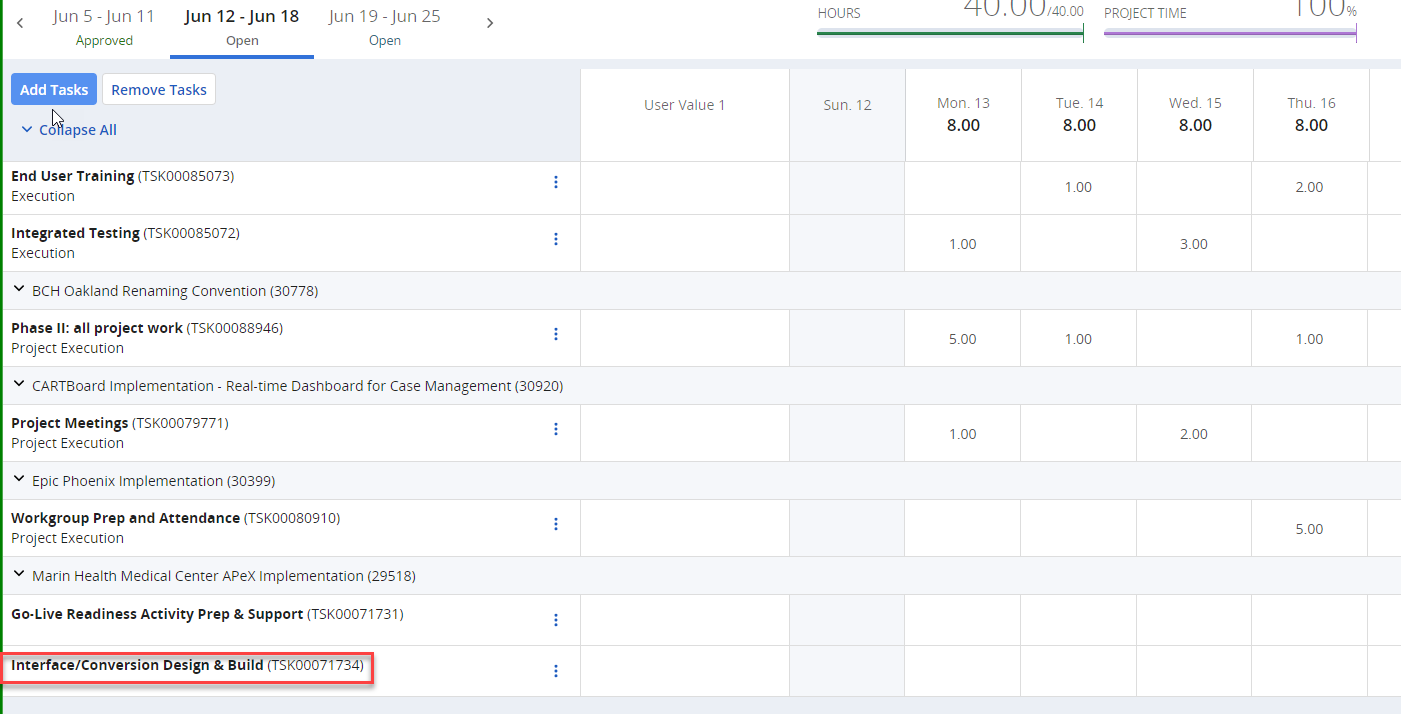
The task will now be available for time entry on your timesheet.
At the end of your work week, click 'Submit' to ensure your work effort is posted to the Project.
Note: If a task is not open for time entry, you can notify the project manager or resource manager to open up the task.
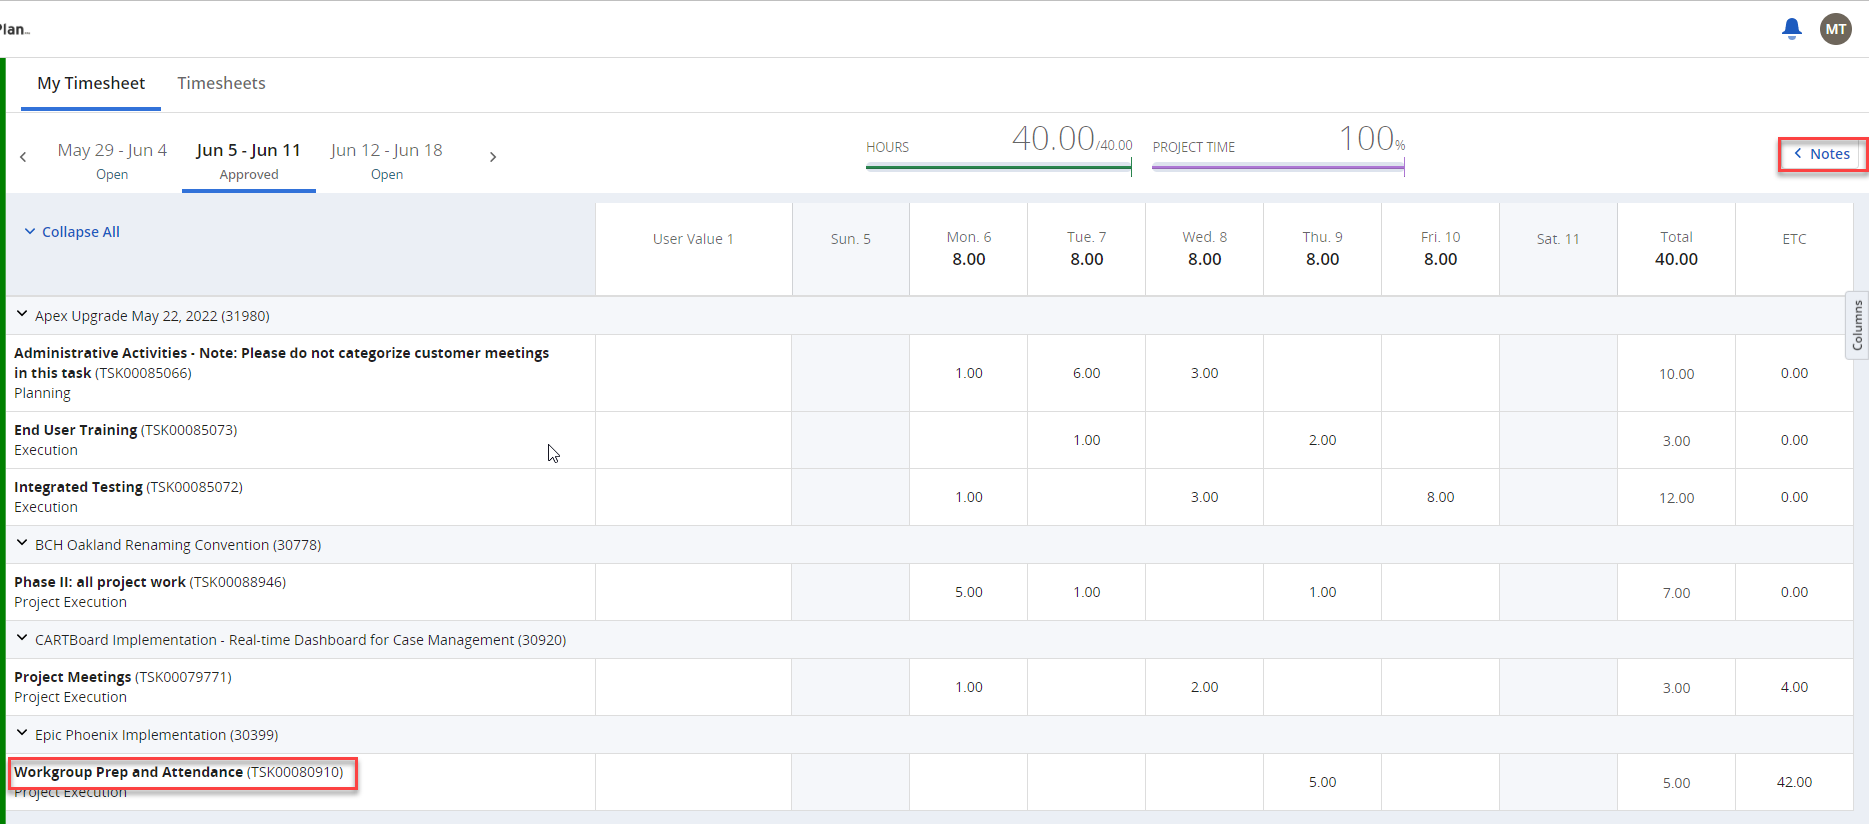
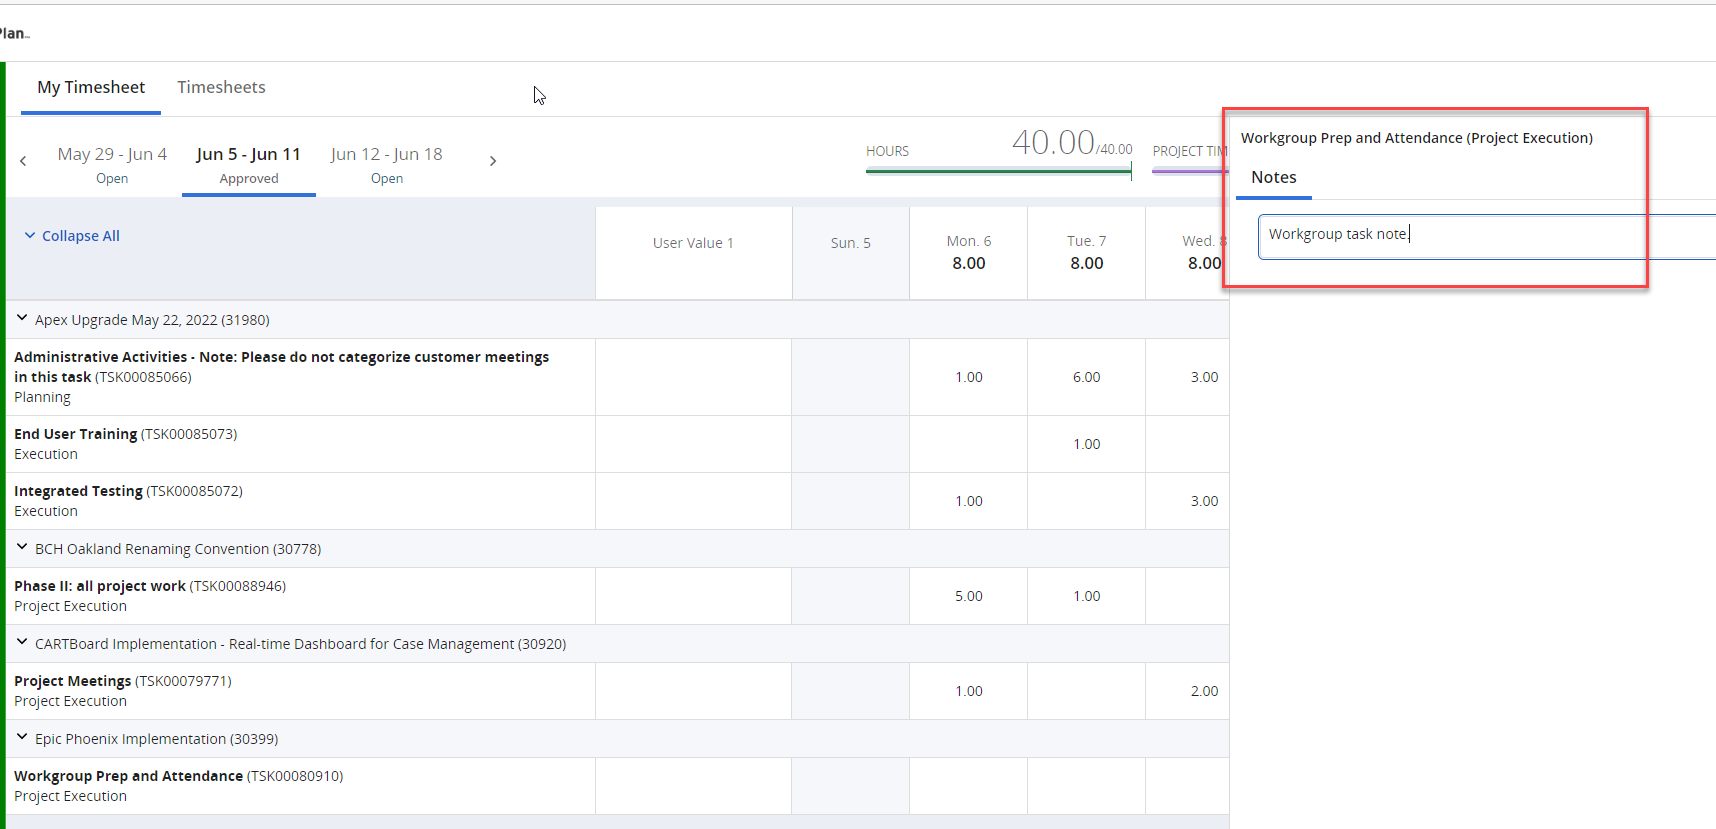
Adding Notes
You can add Notes at the task level and timesheet level.
To add a Task level note, click on the BOLD task name and click on the Notes button in the top right-hand corner.
The Notes window will appear. When your note is complete, click on [Enter] to add the note.
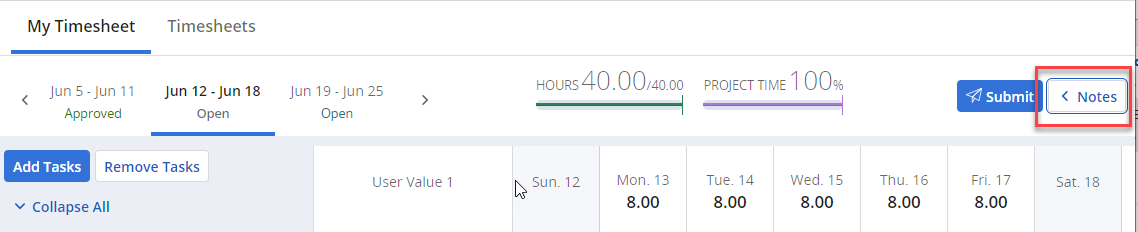
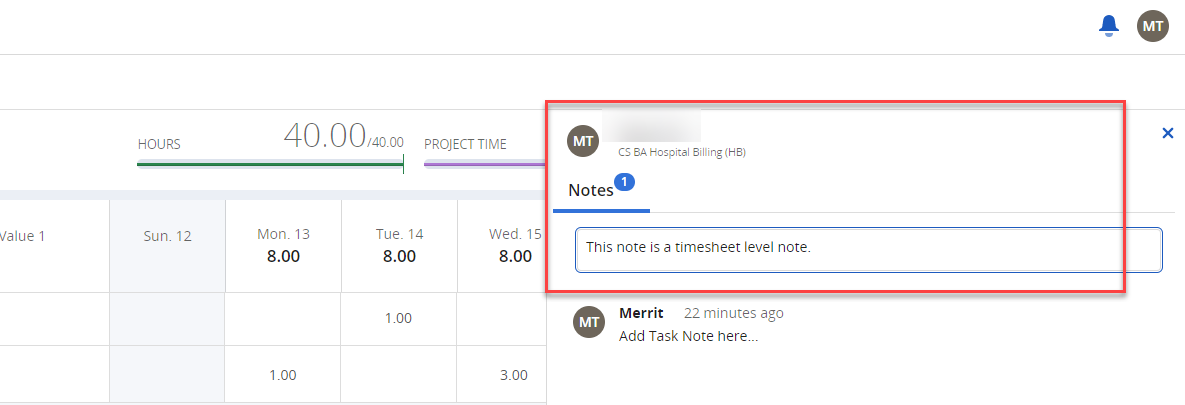
To add a Project level note, click on the Notes button in the top right-hand corner of your timesheet.
The notes fly out pane will appear. Add your note and click [Enter].
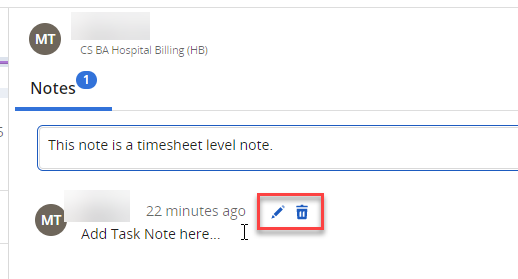
You can edit and delete notes by hovering your mouse over the note. This will expose the editing and delete options.
If resources are working on IT Recharge projects (starting with a ‘CPG’), then Notes should be added to these tasks on the timesheet.