Login, Classic / New UX and Home Menu
How do I login to MyPPM?
I get a weird error message about SSO and then it prompts me to login again?
- Please see the "Note" about logging in for the first time under step 2: How to Login
I get an "Unexpected Error... no valid user found" message when I try to login through MyAccess, what does that mean?
- You don't have an account set up in MyPPM. Please call the Service Desk and ask them to open a ticket for you to get a licensed PPM account.
Timesheets
I was added to a project, but I don't see the tasks in my timesheet. What do I do?
- To find and add tasks to your MyPPM timesheet:
- Navigate to a open MyPPM timesheet and select Add Tasks, then select Select Tasks.
- Once the selection pop-up opens, set the View dropdown in the upper right corner, to UCSF Time Entry Standard. This will display all the tasks available to you.
- Check the boxes for the tasks you want to add and click Add in the bottom right.
- Tip: Once tasks are added to your timesheet you often can use Copy Previous to keep them on your timesheet moving forward.
I was out for an entire week. Do I still need to submit a timesheet for that week?
Yes.
- To submit a 0-hour timesheet:
- Open the timesheet
- Add any task, but do not add time
- Click Submit
What is the lifecycle of MyPPM timesheet statuses?
The typical life cycle of a timesheet is Open --> Submitted --> Approved --> Posted.
When a timesheet needs to be returned or adjusted it can also follow these paths:
- Open --> Submitted --> Returned --> Submitted --> Approved --> Posted
- Open --> Approved --> Posted --> Adjusted (the original timesheet holds the Adjusted status indefinitely and a new timesheet for the same period is auto-created) Open --> Submitted --> Approved --> Posted.
When a user selects Submit on their timesheet, the timesheet will move from Open to Submitted. UCSF IT uses Auto-approve and Auto-posting jobs to move the timesheet from Submitted to Approved and Approved to Posted.
Settings & Notifications
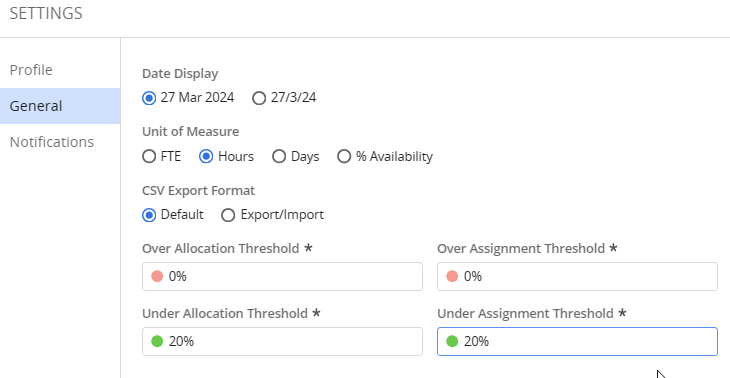
How do I change my unit of time from FTE to Hours?
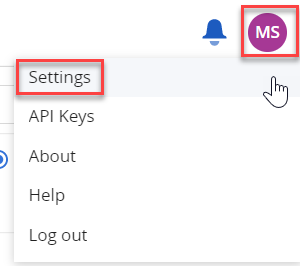
- Go to your profile in the top right corner, click Settings, and change to desired setting:
Click on General and select Unit of Measure as FTE or Hours.
How do I set up notifications in MyPPM?
Modern UX
There are a select number of notifications which can be modified from within the Modern User Experience.
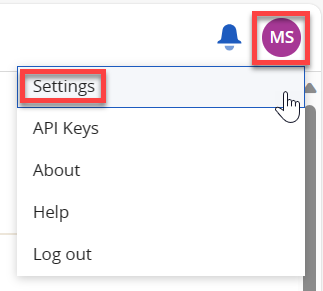
Click on your initials in the top right-hand corner and select Settings.
Click on the Notifications tab to display options for Conversations, General and Sharing.
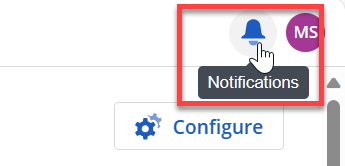
You can choose to receive Alerts (I.e. notifications which appear under the bell icon in the top right-hand corner.
You may also choose to receive email notifications. SMS notifications are currently not sent by UCSF.
Conversations
If you are tagged in a conversation (such as when using the Conversations on a project record), you can choose how you would like to receive these notifications.
General
General notifications are those which support the following objects within MyPPM:
- Investments (Projects, Ideas, and CITs)
- Custom Master Objects
- Tasks
- Risks
- Issues
- Change Request
- Status Report
- Custom Sub-Objects
- Objective
- Page
Sharing
System Administrators have the capability to share system notifications with users that pertain to jobs or processes. If a job or process has been shared with you, you can choose how you wish to receive a notification for this. I.e. via Email, Alerts or SMS.
Note: Any notification updates for Conversations, General and Sharing, in the Modern UX, will also be reflected in Classic.
Classic
There are additional notification options available in Classic.
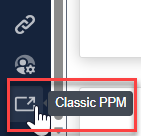
Login to MyPPM and navigate to the Classic User Experience (UX) via the menu item.
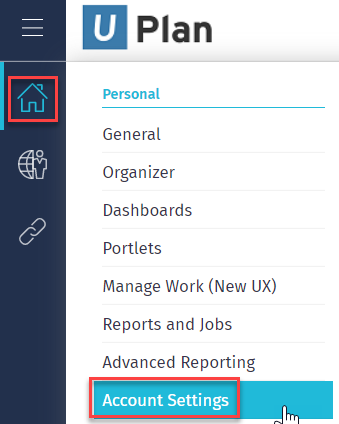
Hover over the Home icon in the left menu, find the Personal menu and select Account Settings.
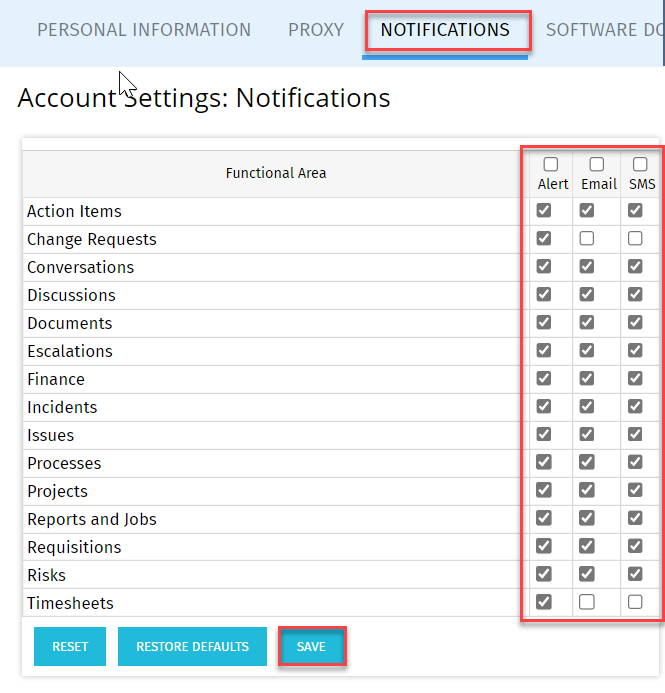
Go to the Notifications tab, select which items you'd like to be notified about and click Save.
Note: Email and SMS are self-explanatory. Alerts are sent within MyPPM and show up on the first login page on the right side. You probably want to turn OFF SMS alerts and turn ON email alerts for items you need to know about, like change requests, escalations, issues and risks, timesheets. This will depend somewhat on your role in PPM.
For Project and Resource Managers
How do I see all the project tasks in order, like in MS Project or Smartsheet?
- Navigate to the Tasks training content and scroll down to the section on the Timeline view.
How do I add columns to the Tasks, Risks, Changes, Issues, Status Update and other screens?
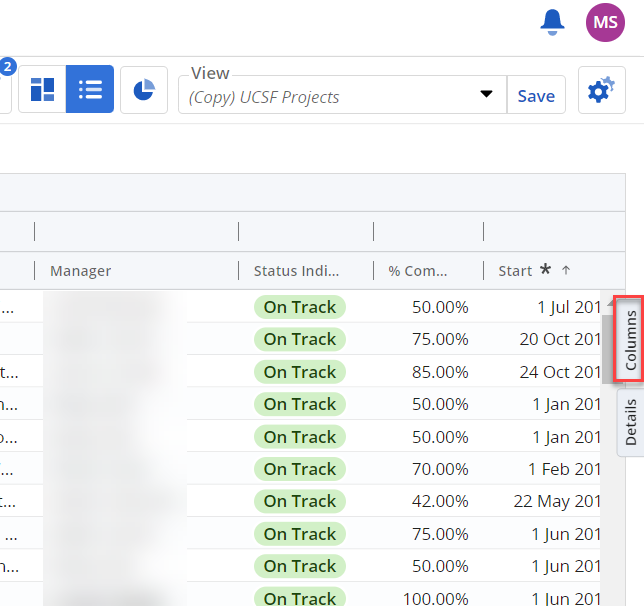
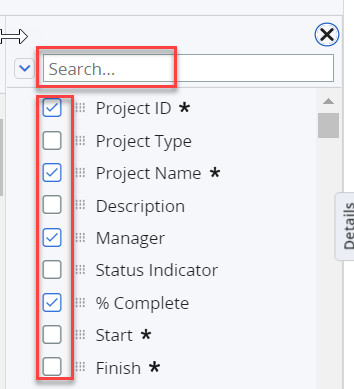
- The key to adding columns in any view is to click on the Columns pane at the very right edge of the screen.
- Enter text into the Search... field to locate the field you are searching for. Check or uncheck the box beside the field name to add or remove columns.
My MyPPM project task dates recently changed and I cannot change them back. What is happening?
- The likely reason this is you have no ETC (Estimated Time to Completion) listed on these tasks AND everyone assigned has started logging time.
- When a task has no ETC listed, MyPPM will automatically update the assignment start/end dates to match the first date time is logged to that task and the last date time is logged. The task level dates will update automatically to match the first and last assignment dates. However, when someone is assigned with start/end dates and has not logged any time yet, the system will hold the original dates until time entry has occurred. As soon as everyone assigned has started time logging and ETC reaches 0, the system auto updates to using the last date anyone logged time as the end date.
- To resolve, add ETC hours to the assignment/task and then set the date.
Export to Excel or CSV
How do I export data?
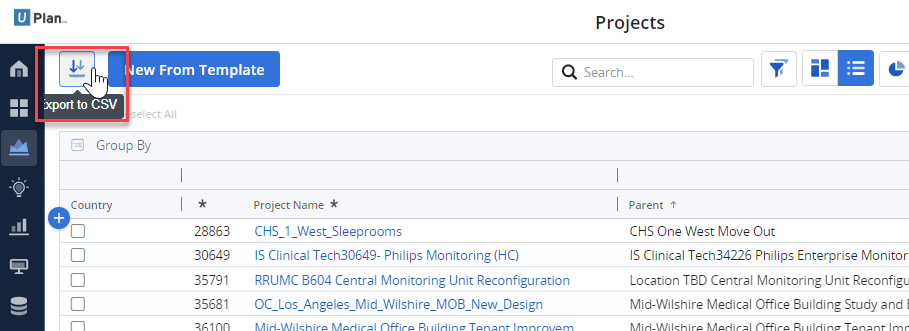
When working with the list view of a particular object, you will have the option to export your data to a CSV file, which can in turn be opened in Excel.
In this example we will export our Project list view to Excel. Click on the Export to CSV icon in the top left corner.
If your list is quite large, the following message will be displayed.
Once your download is complete, it will be available within the Notifications section. Click on the file name to open.
You will be presented with the download option as specified by your web browser. In the example below, we are using MS Edge.
Your file will open in Excel.
Smaller files will be downloaded straight away to the downloads folder, as specified by your web browser.
MS Edge:
Chrome:
