Step1
Detection and notification
If a fuzzy match is detected after submission of a new user account, the person who initiated the new user account will receive an email notification with the relevant transaction.
Step2
Locate the transaction ID in emails/tickets
- Locate the transaction ID referenced in the email received or from the ServiceNow ticket. Then open the Duplicate ID Resolution Web application.
- NOTE: You may be redirected to the Okta login page. Enter your UCSF username and password, and you will be directed to the application landing page.
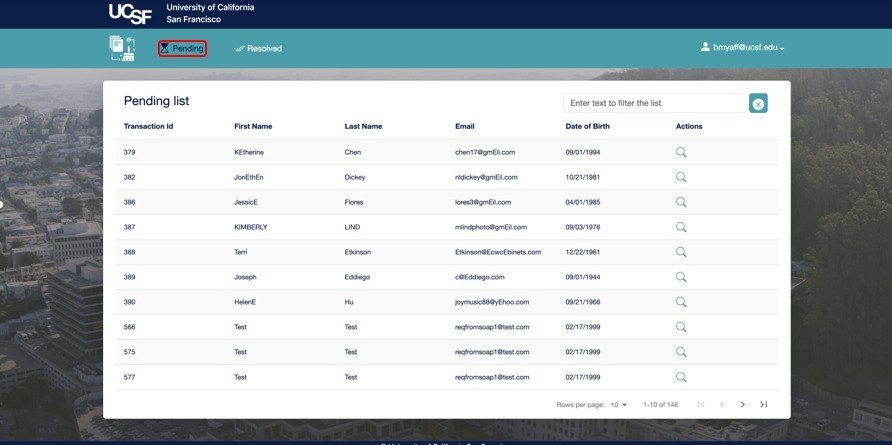
- Select Pending.
Step3
Navigate to the De-duplication web app
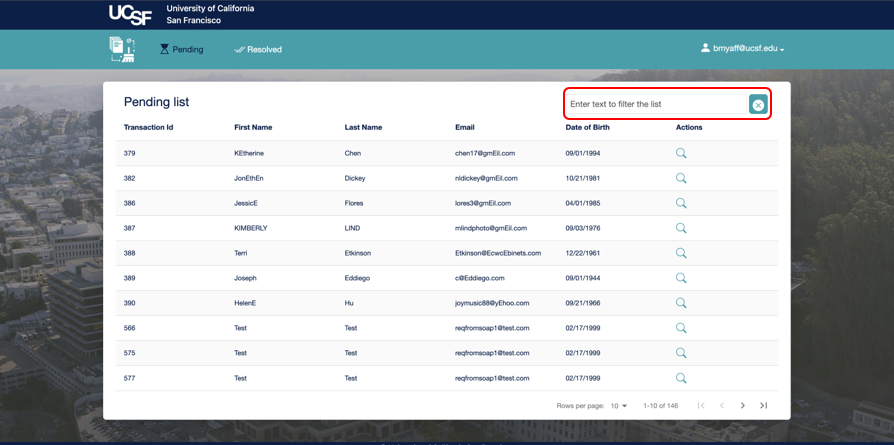
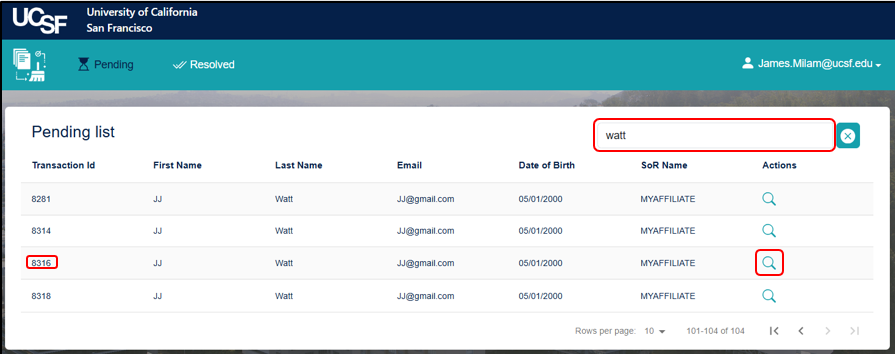
You will be brought to all pending fuzzy matches across all Systems of Record. You can search across all of UCSF (i.e., students, faculty, staff, residents/fellows, affiliates, etc.) using last name and date of birth under the newly added Search tab. Or you can enter the transaction ID from the fuzzy match notification email in the search bar shown.
Step4
Review potential matches
Once you have located the applicable record, select the magnifying glass icon next to the record.
Step5
Assign or create an ID
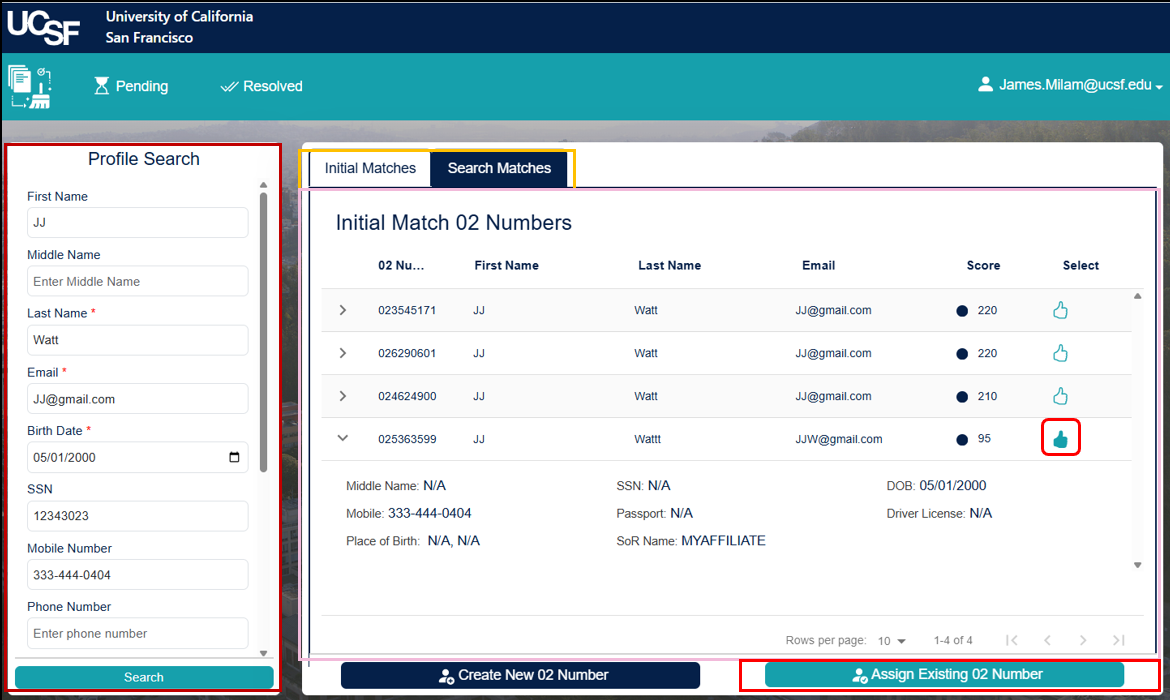
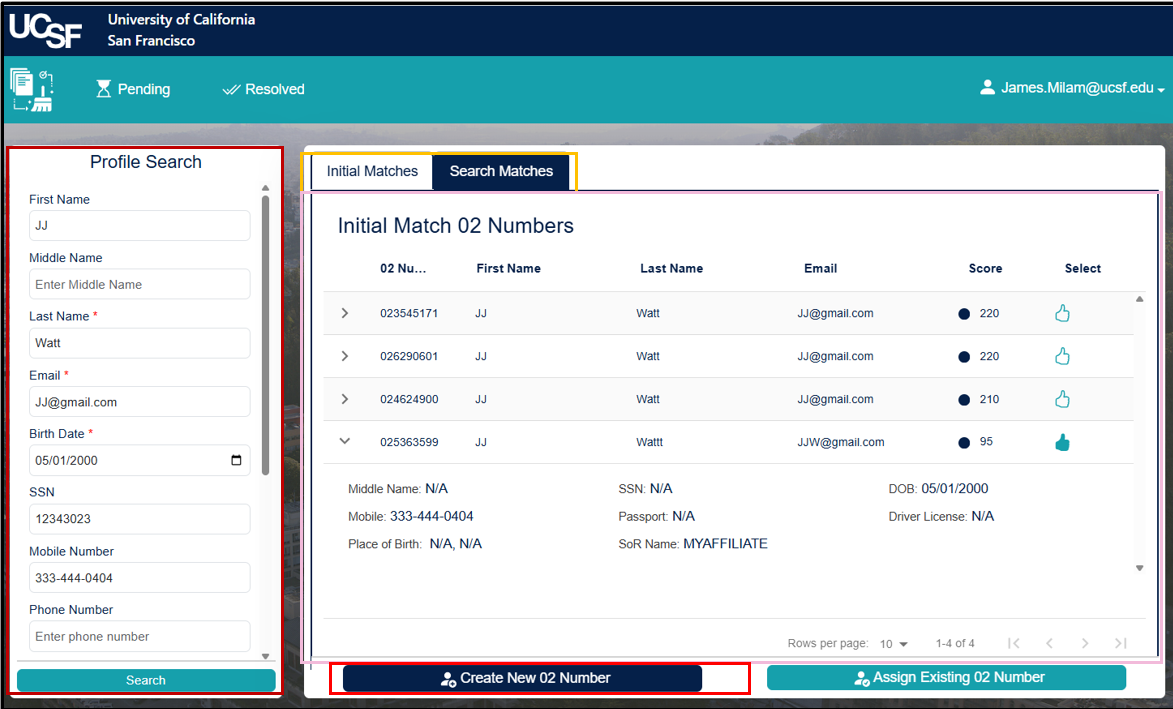
In this step, you will choose whether to assign or create an 02 Number (UCSF ID number). On the Initial Match Details page, carefully review the records shown in the Initial Match 02 Numbers pane. You will need to decide if any of these records match the individual/new user you are adding.
- If a record matches the person:
-
Select the Thumbs Up icon next to the corresponding record that matches the identity of the new record you entered. Then select Assign Existing 02 Number. This merges the new record with the correct existing profile.
-
- If no records match:
-
Select Create New 02 Number to establish a new identity record.
-
Step6
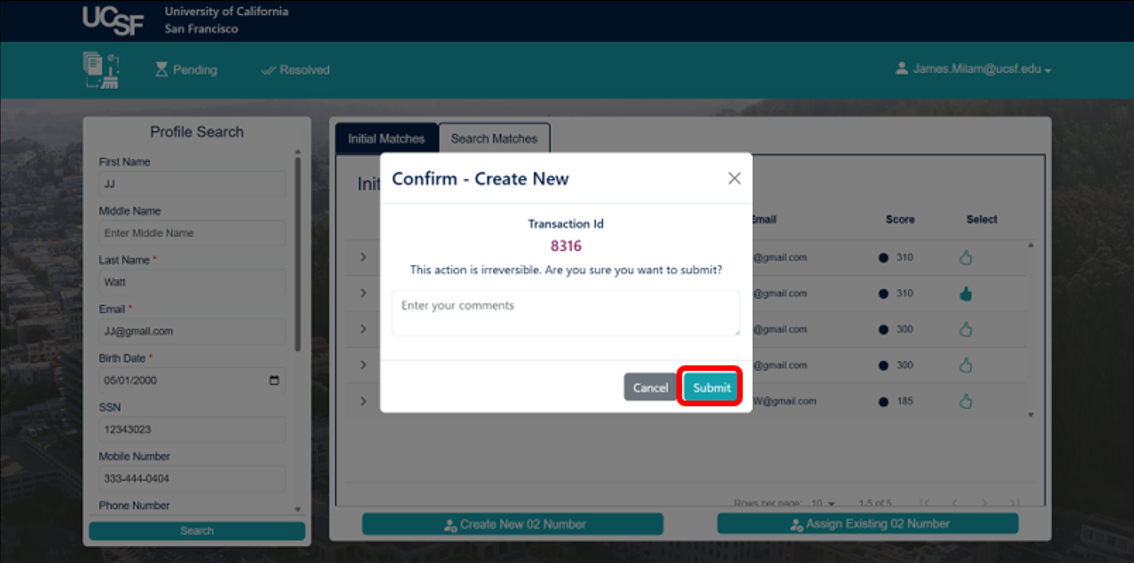
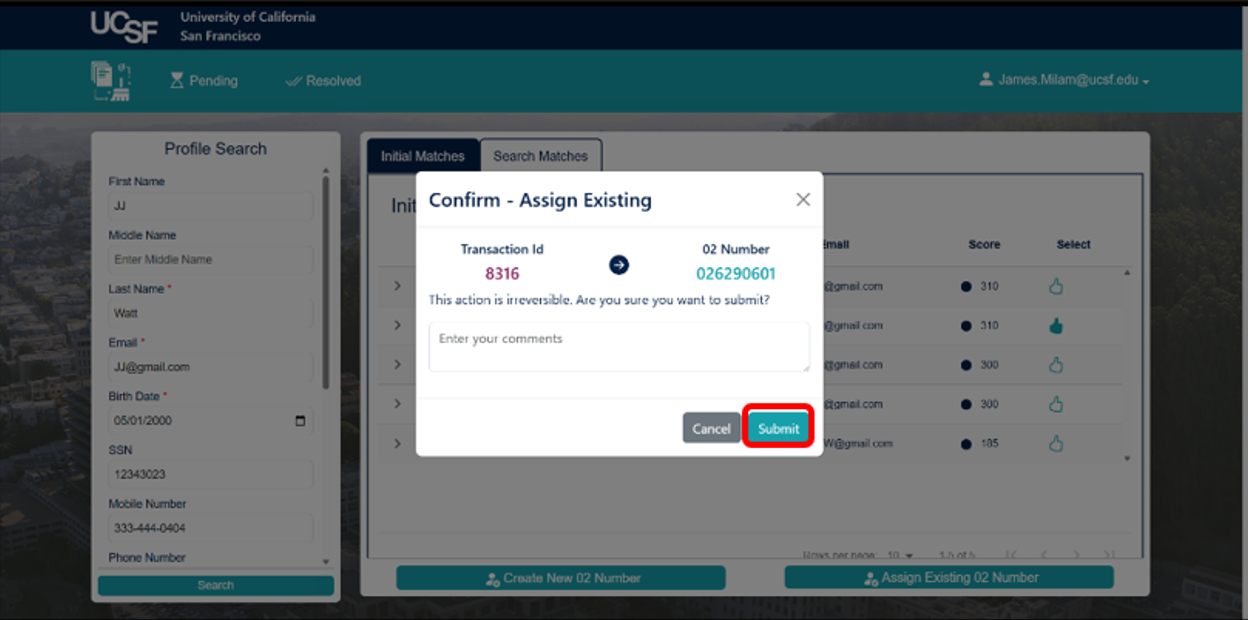
Confirm resolution
-
If you selected Create New 02 Number, review the Confirm – Create New pop-up window, enter any relevant comments, then select Submit.
-
If you selected Assign Existing 02 Number, review the Confirm – Assign Existing pop-up window, enter any relevant comments, then select Submit.
Step7
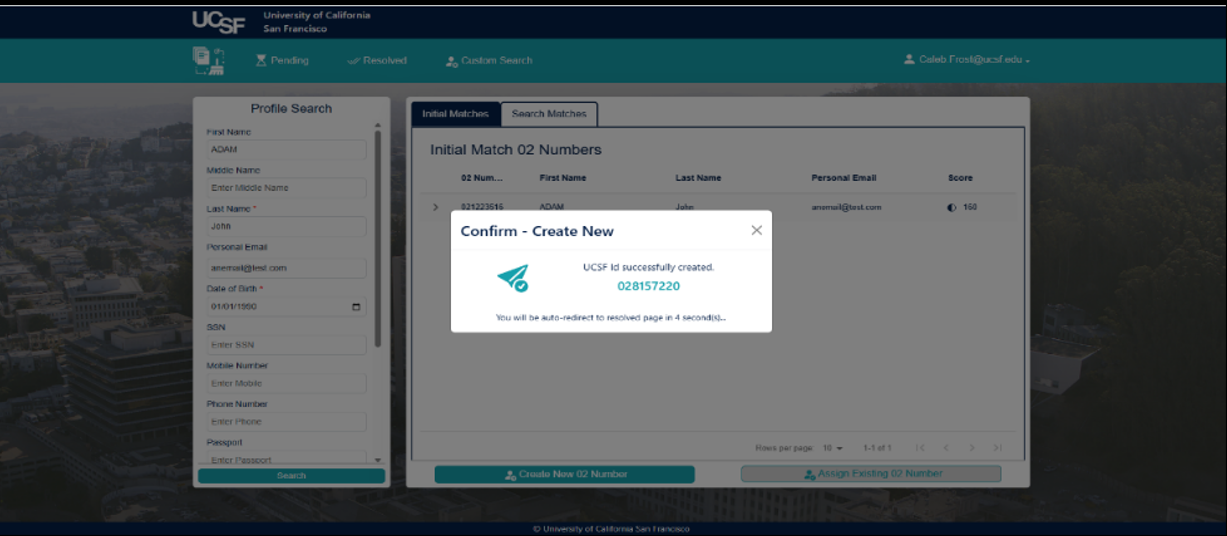
Confirm Submission is Complete
Once the submission is complete, you should see this screen.
Note: For most users, no further action is required after the fuzzy match has been resolved. However, some roles and specific Systems of Record may require additional action:
- ServiceNow: If you have an active role in ServiceNow ticket management within your group, you and your team must work together to ensure proper routing, handling, and resolution of the fuzzy match incident in ServiceNow. If you have questions or need further assistance, please submit a ServiceNow ticket for support.
- Systems of Record: Your System of Record may require you to complete the fuzzy match process in its system. For example, MyAffiliate users must click the Fuzzy Match Resolution" button and submit their request. Log in to your System of Record to check for any remaining tasks. See example below.