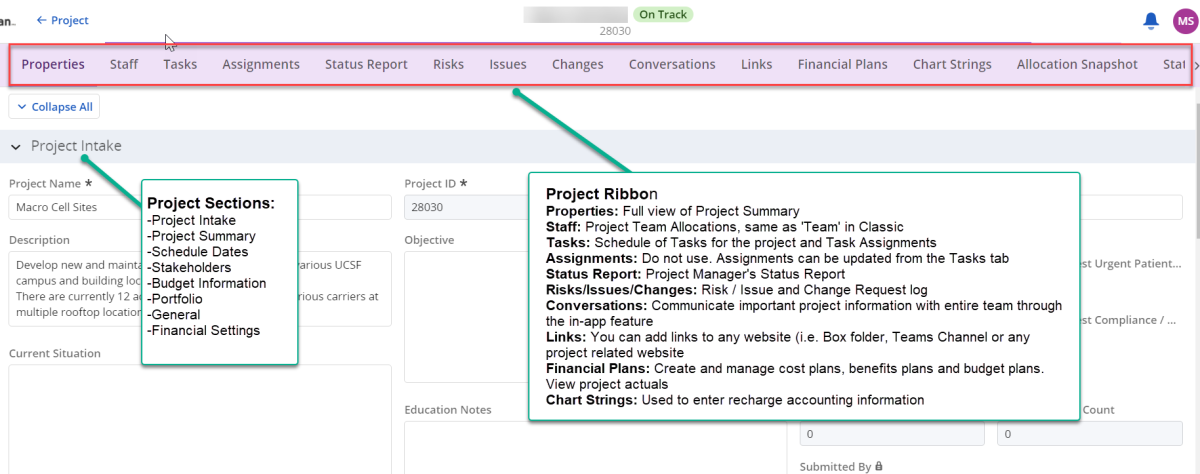
2. Locate your project record and click on the project tile / name. Work your way through the buttons at the top menu from left to right to add information. In each section, you may need to click the left arrow on each item to expand.
Fields to Complete:
Properties:
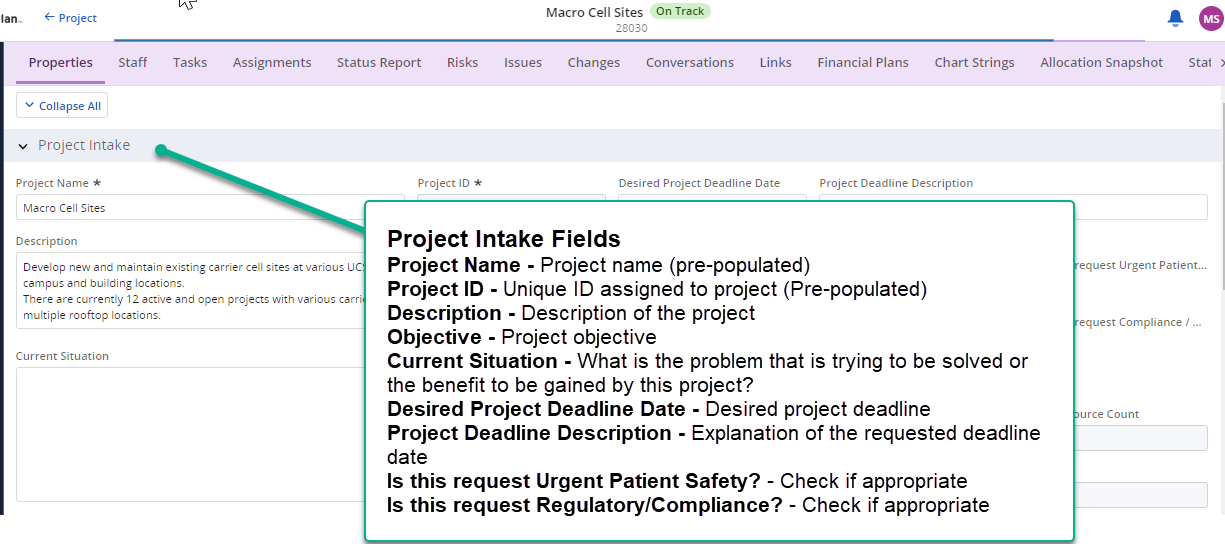
Project Intake:
- Complete all required fields, see screenshot below for help.
Project Summary:
Complete all required fields, see screenshot below for help.
Schedule Dates:
- Add Start and Finish dates. Note: Start and Finish dates may be adjusted by the system based on timesheet entries and resource allocations.
Stakeholders:
- Executive Sponsor is a locked list, so select the appropriate person or leave it blank if they are not available.
- Executive Sponsor Entity value must align to the Executive Sponsor selected.
- For Beneficiaries, add department, if applicable.
Budget Information:
- Okay to leave empty.
Portfolio:
- Organization OBS - Confirm set to UCOP/UCSF or a unit below. Don't change from this.
General:
- For CPG Projects: Enter D&C Project ID and ServiceNow ticket number.
- For all other projects, you can leave this area empty.
- Confirm that the check boxes for Active and Open for Time Entry are both checked.
Staff
Resources
- Confirm list of staff includes all the people who work on your project. Add anyone missing (see For PMs: Allocate Resources or For RMs: Assign Resources for help)
Tasks
- Go to grid view and confirm that you can see a list of tasks.
- You can also look at the Timeline view to see tasks and a Gantt chart.
- For full instructions on Task Management go to the training page to Create and Edit Tasks.
Risks / Issues
- See Create Issues, Risks, Decisions and Changes for help.
Links
- To include a document or link, please save it in OneDrive, then add a link to it in the Links section.
Status Report
Changes / Conversations / Financials – okay to leave blank.
Chart Strings:
To add a chartstring to your project:
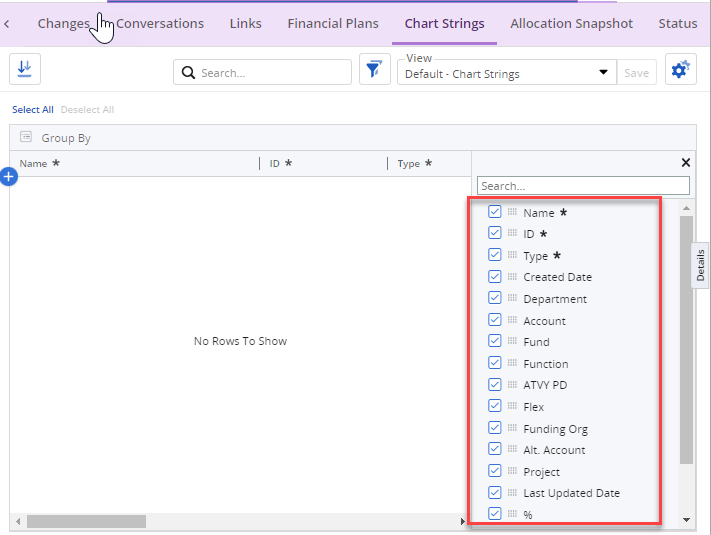
- In MyPPM: go to Chart Strings tab in top ribbon
- Scroll to the right and find the “Columns” icon on the edge of the screen and click it.
Select fields to add (if they are not already showing) and close.
- Click the plus symbol to add a new row
- Give the row a name; the default is fine, but you could call it "Campus funded", etc.
- Click the Type drop down for the funding source business unit; e.g. SFCMP for Campus, Med Center for Health:
- Fill out the Type column first, that prepopulates all the possible values in the other screens.
- Please be sure to set the Cost Center allocation percentage. Split funded projects should total to 100%.
- Med Center funding sources require a capital account number in addition to the project id. If using departmental funding source instead of project id, this will default to 69978.
- Fill out the rest of the fields from the drop downs.
For further detail on Chartstring requirements and definitions, refer to the document below.


