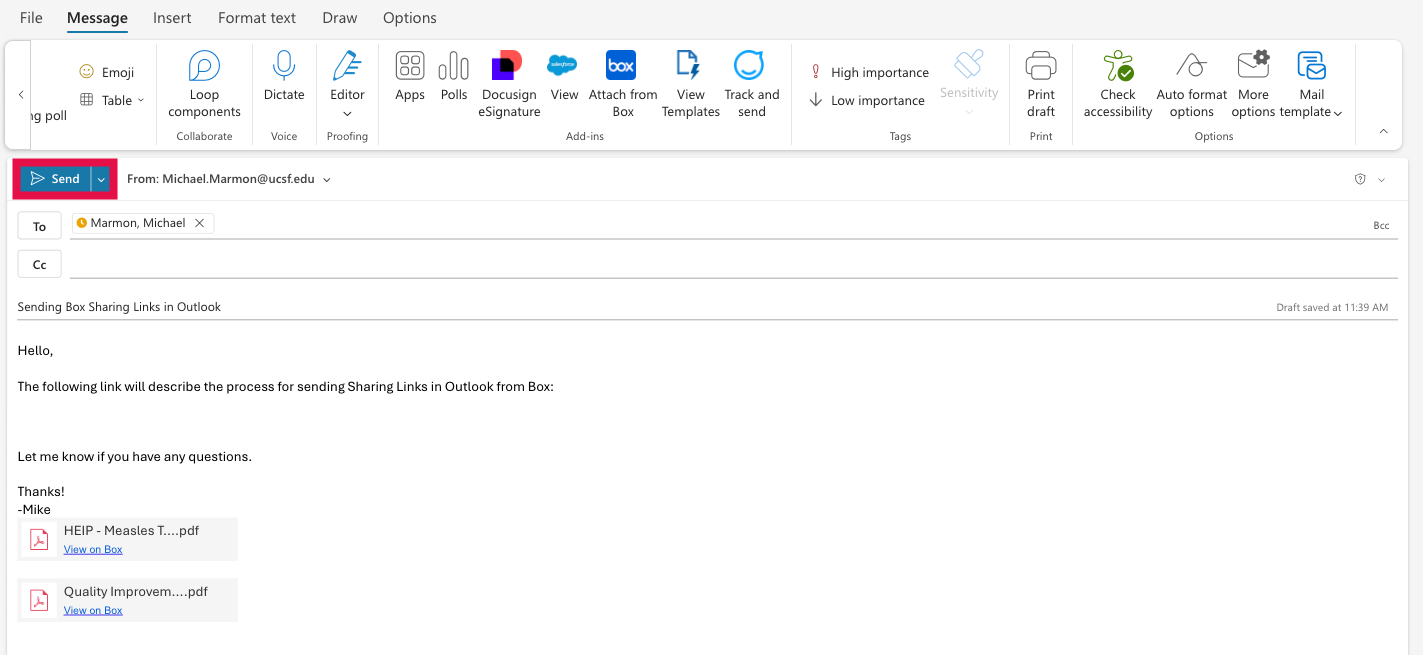
Overview
Box for Outlook simplifies the process for including sharing links for Box files and folders. This page demonstrates the process for sharing links in Box for Outlook.
Introduction
Sending Box Sharing Links in Outlook
Step1
Launch Outlook on your desktop or on the Web.
NOTE: To use Outlook desktop, you will need to be connected to the UCSF network via VPN.
Step2
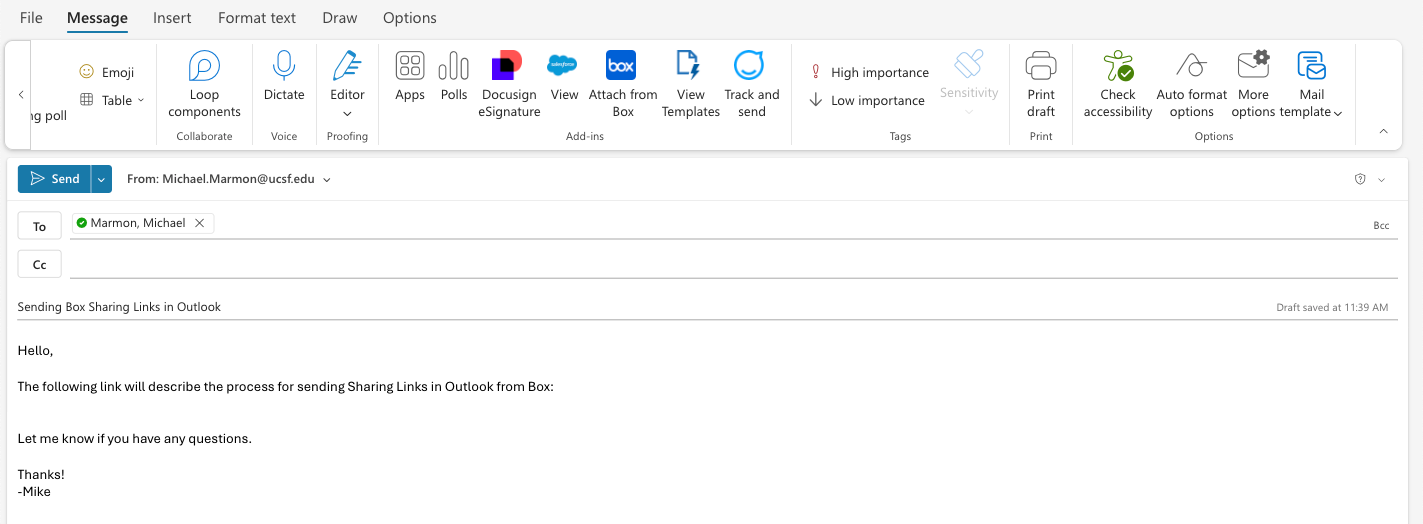
Create a new message.
Step3
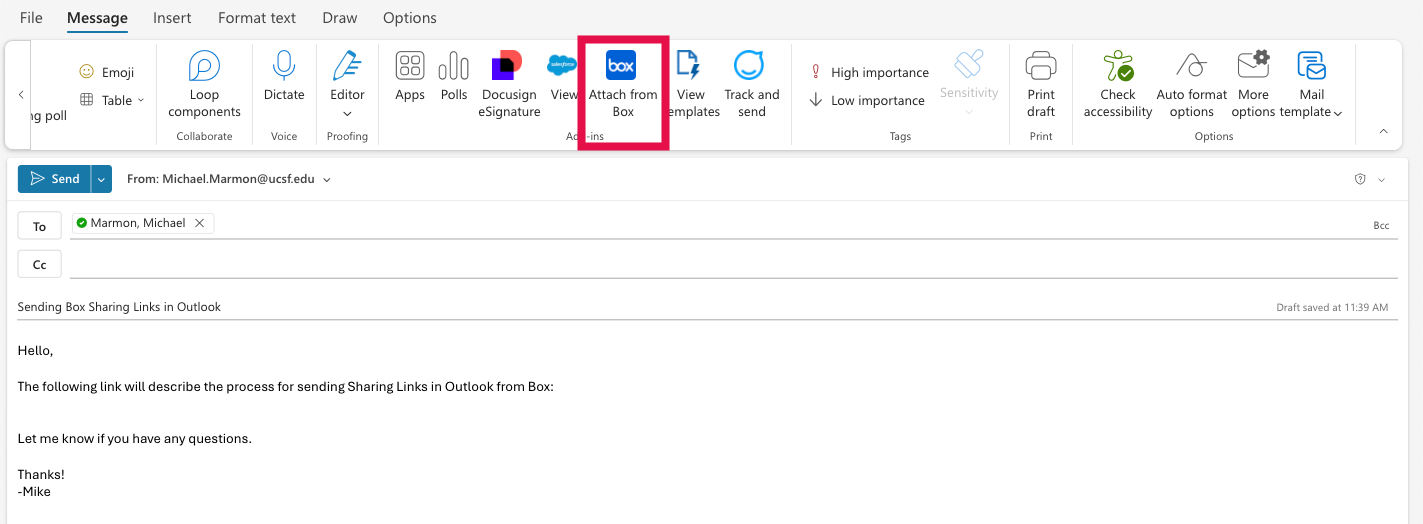
Select the Box icon.
Step4
If prompted to login in within the Box Information pane, login to Box.
Step5
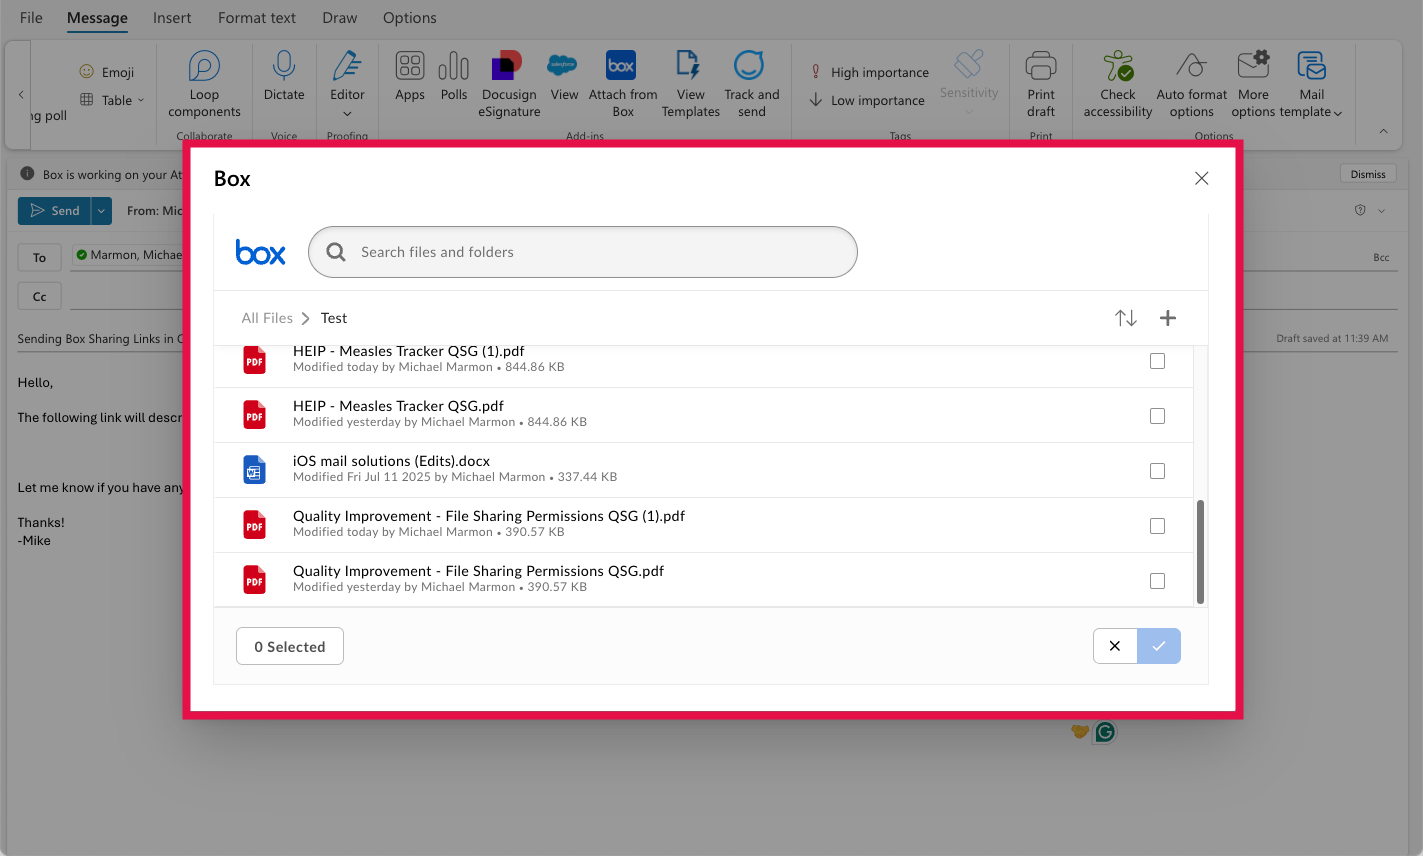
Within the Box pane, locate and open the folder containing the desired file to be shared with the recipient.
Step6
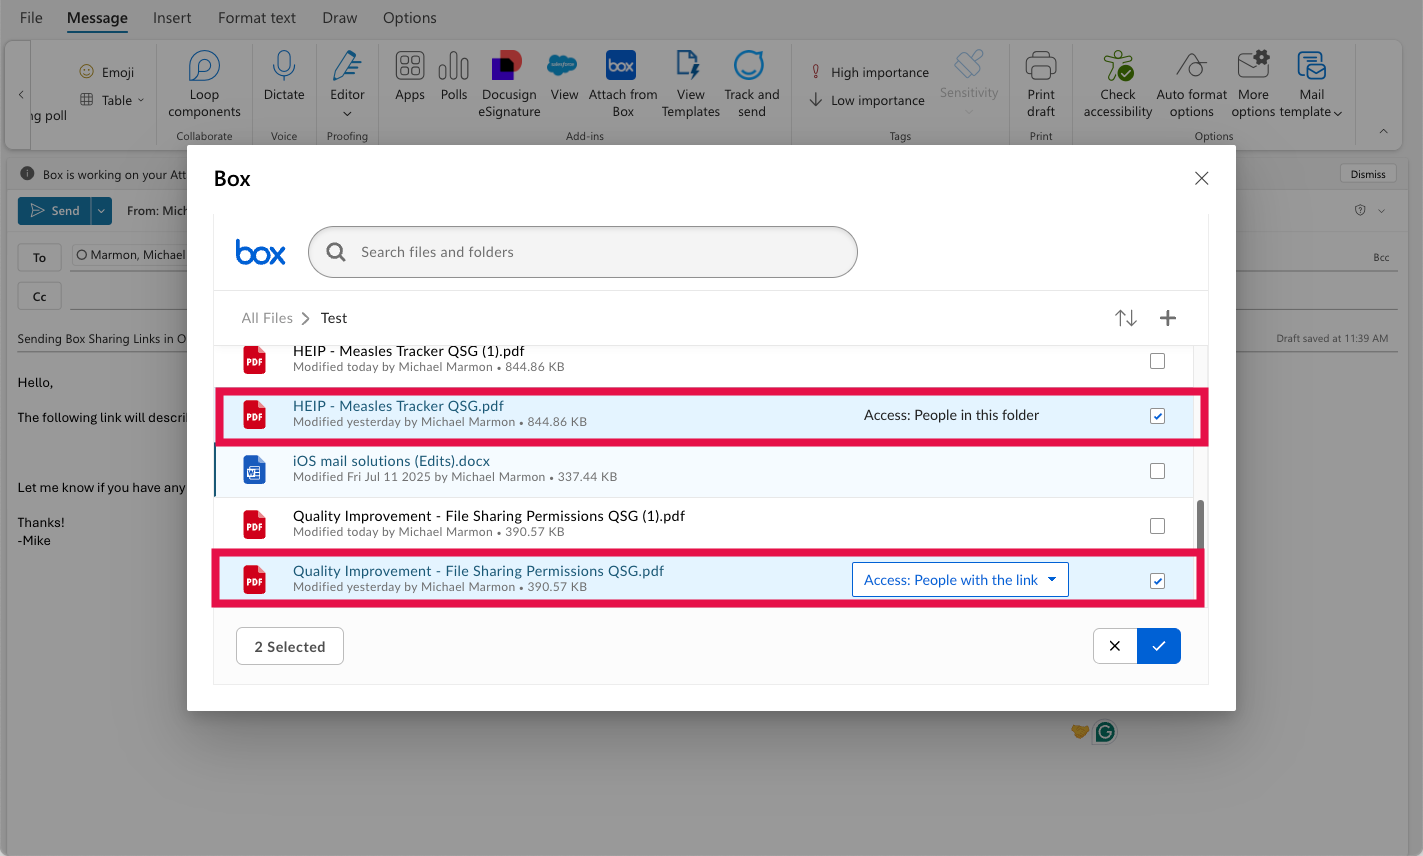
Select the file(s) to be included as a sharing link.
NOTE: You can adjust the file access permissions by clicking the Access dropdown before selecting either: people with the link, people in the company, people in this folder/ file.
Step7
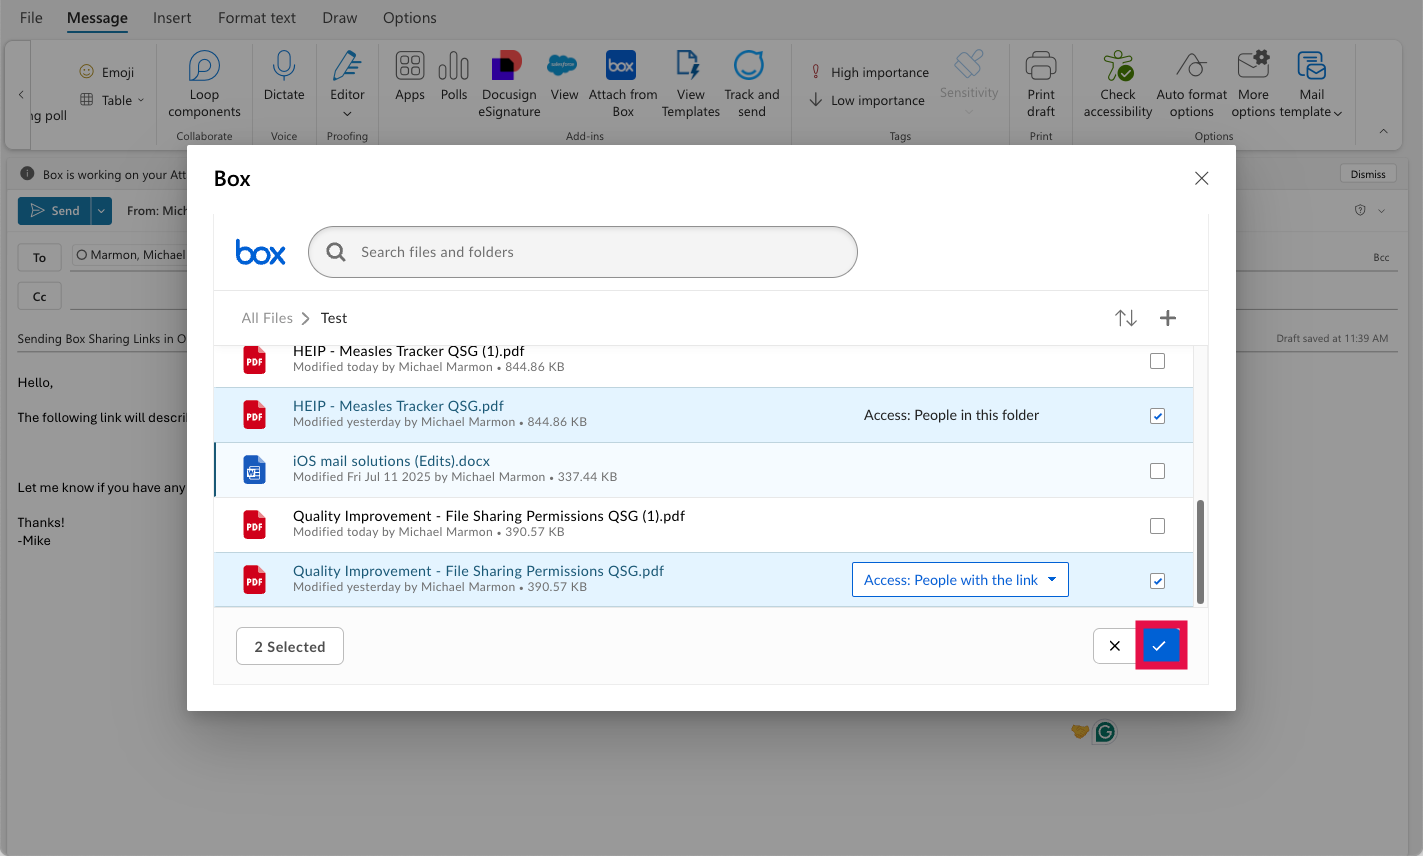
Click the Checkbox to add the sharing link.
Step8
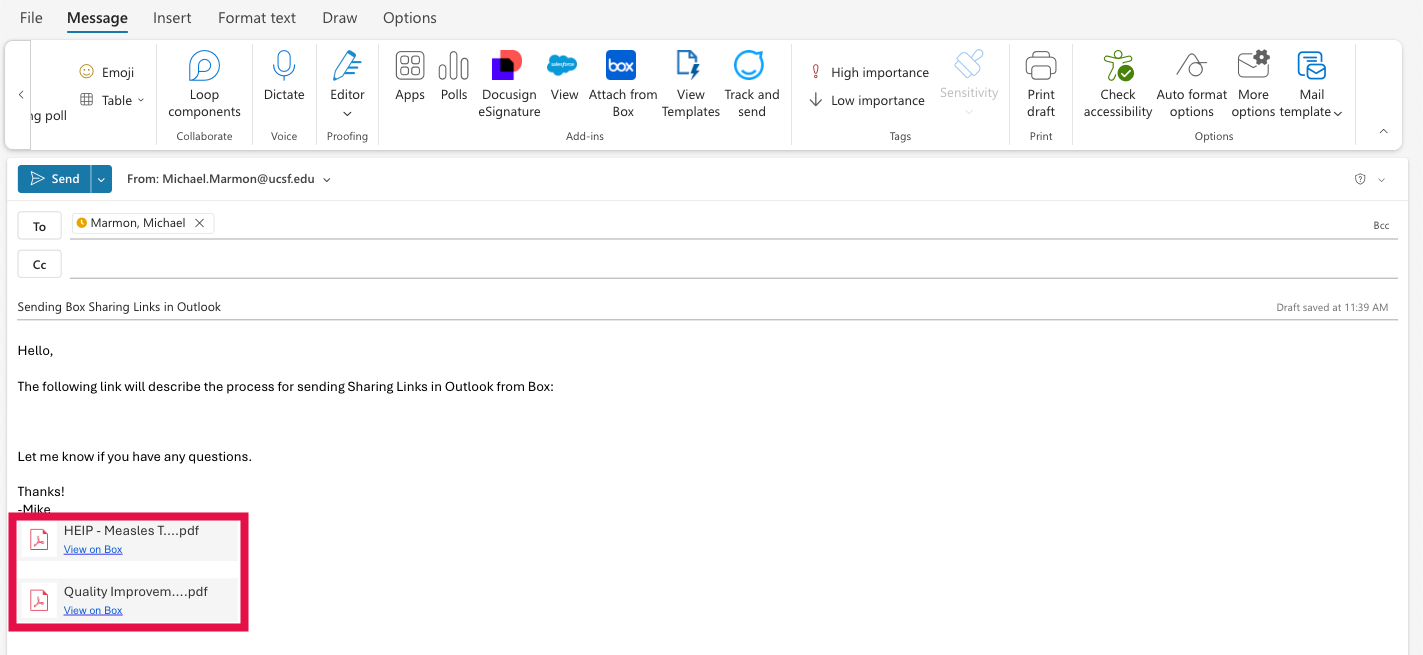
The message will refresh and the shared link to the file(s) will be added to the message.
Step9
Click Send to send your message with the included links.