Overview
As UCSF grows as an on-site institution, the demand for space is increasing. Zoom Workspace, already available through UCSF’s Zoom platform, offers a smart and flexible solution integrated with Outlook. This page will assist users with accessing and using Zoom Workspaces to reserve space on-site for your work and collaboration with colleagues and stakeholders.
With the demand for space increasing at UCSF, Zoom Workspace was implemented to assist with the reservation and usage of space. The following instructions will assist you with using Zoom Workspace to reserve space when you are working on campus.
Want to reserve a workspace or room on the go with Zoom Workspace? You are able to access Zoom Workspace within the Zoom mobile application. Learn more about reserving a workspace or room with Zoom Workspace on mobile devices.
- Book a workspace or room
- Create a Recurring Workspace Reservation
- View, edit, or delete upcoming reservations
- Delete a reservation using your avatar on the floor map
- Replace an existing reservation with a new reservation
- Check in and out of your reservation
Book a workspace or room
Navigate to the Zoom web portal or open the Zoom desktop app.
In the left-hand navigation, select the Workspace Reservation or Workspaces in the desktop app.
NOTE: Depending on your level of access, you may only be able to view certain floors.
On the Workspaces screen, you will see the current time period and location information. You can also filter by certain attributes or views.

Select the + Reserve before selecting the Reserve a desk or Reserve a room option.

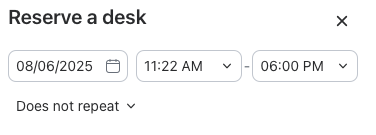
On the Reserve a desk screen, you will be able to set the Reservation date as well as the start and end times for the reservation.
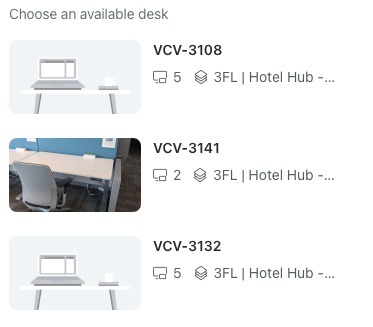
Select one of the available desks by selecting the picture of the desired desk.
From the calendar view, verify the date, start and end times of the reservation.
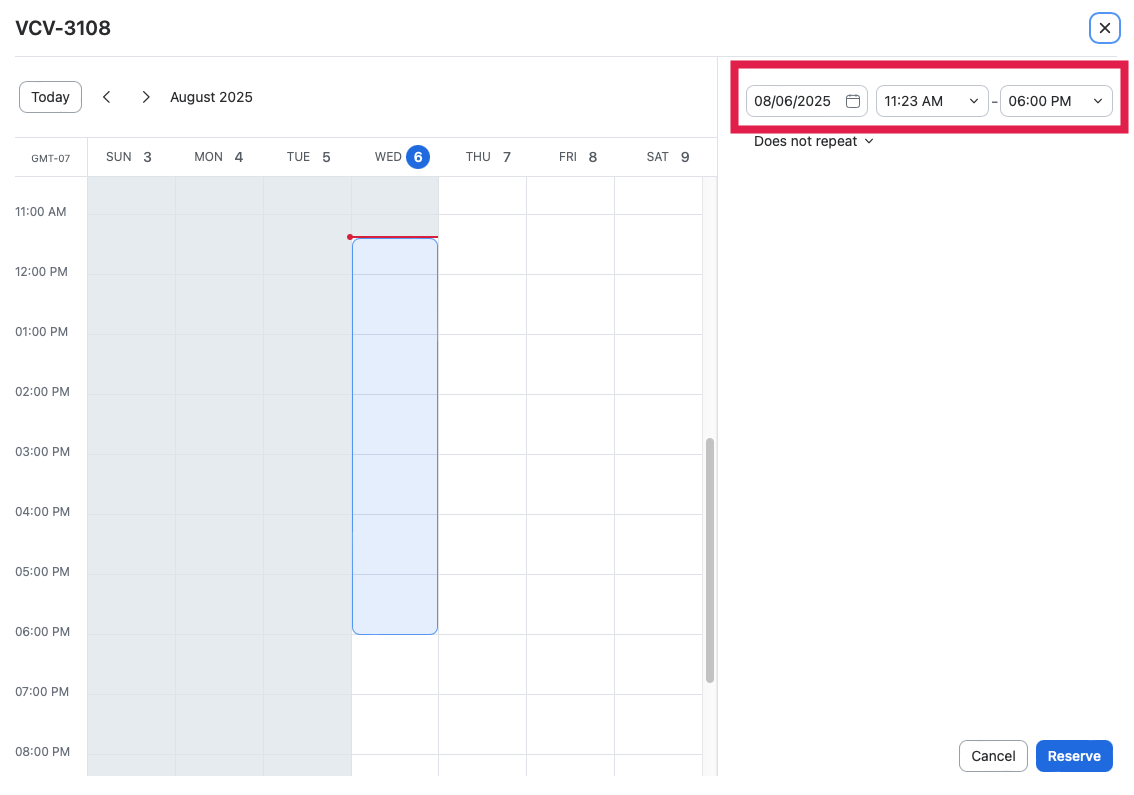
Click the Reserve button to reserve the desk or workspace.
Congratulations! You have successfully reserved a workspace or room in Zoom Workspace.
Create a Recurring Workspace Reservation
If you have a consistent on-campus work schedule, setting up a recurring workspace reservation will ensure that you have continuous access to your preferred workspace.
Navigate to the Zoom web portal or open the Zoom Workplace desktop app.
In the left-hand navigation, select the Workspace Reservation or Workspaces in the desktop app.
NOTE: Depending on your level of access, you may only be able to view certain floors.
On the Workspaces screen, you will see the current time period and location information. You can also filter by certain attributes or views.
Select the + Reserve before selecting the Reserve a desk or Reserve a room option.
On the Reserve a desk screen, you will be able to set the Reservation date as well as the start and end times for the reservation.
Select the time frame for the reservation on the space's calendar. Select the Does not repeat dropdown to set the recurrence of the reservation for Daily, Weekdays, or Custom.

If the Custom option is selected, you can set the reservation date and duration before setting the recurrence (Daily, Weekdays, or Weekly) and how often it repeats, as well as the days and end date for the series of reoccurring reservations. Once you have configured the reservation to fit your needs, click the Done button to submit your changes.

Click the Reserve button to create a recurring reservation for the selected workspace or room.
Congratulations! You have successfully created a recurring reservation using Zoom Workspace on the web or Zoom desktop application.
View, edit, or delete upcoming reservations
Navigate to the Zoom web portal or open the Zoom desktop app.
In the left-hand navigation, select the Workspace Reservation or Workspaces in the desktop app.
Select the My Reservations link. Select the Month dropdown menu to view your reservations for a specific month.

Select the ... to interact with your reservation.

Within the menu for the reservation, you can complete the following:
Get Directions – Select the Get Directions option to review directions (e.g., Wayfinding map) to your reserved space as well as the restrooms or other locations.
Edit Reservations – Allows you to edit the details of your reservation, then click Reserve button to commit your changes.
Delete Reservation – Selecting the Delete Reservation option will delete your reservation, you will receive a confirmation email that your reservation has been deleted.
Delete a reservation using your avatar on the floor map
Navigate to the Zoom web portal or open the Zoom desktop app.
In the left-hand navigation, select the Workspace Reservation or Workspaces in the desktop app.
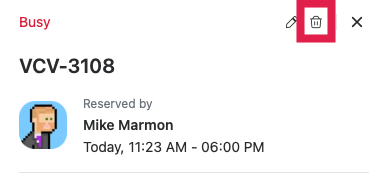
On the floor map, select the reserved space that contains your avatar.

Click the trash can icon.
Congratulations! You have successfully deleted your reservation. You will receive a confirmation email that your reservation has been deleted.
If you attempt to reserve a second space that occurs during the timeframe of an existing reservation, you will receive a notification that you have an existing reservation.
In the notification, review your existing reservation details.
Click the replace button to replace your existing reservation with the new reservation. NOTE: Zoom Workspace will automatically delete the existing reservation before replacing it with the new one.
You can review the new reservations by selecting the My Reservations button.
Check in and out of your reservation
You will need to check into your reservation 15 minutes prior to your scheduled reservation time if it is not currently being used. NOTE: If you do not check in within 15 minutes of the scheduled start time, it will be automatically cancelled, and the space will be made available to other users.
There are several options for checking in and out of your space reservation. You can scan the QR code at the space when you arrive and leave the space.
Check in to your reservation
Navigate to the Zoom web portal or open the Zoom desktop app.
In the left-hand navigation, select the Workspace Reservation or Workspaces in the desktop app.
Select your avatar on the location map.
The space’s detail screen will load. Click the Check in button before selecting the Check in option again on the Check in screen.

Congratulations! You have successfully checked in to your reservation.
Check out of your reservation
If you have finished using a reserved space before your reservation concludes, be sure to check-out from your reservation to make the space available to other users.
Navigate to the Zoom web portal or open the Zoom desktop app.
In the left-hand navigation, select the Workspace Reservation or Workspaces in the desktop app.
Select your avatar the location map.
The space’s detail screen will load. Click the Check-out button before selecting the Check-out option again on the Check-out screen.

Congratulations! You have successfully checked out of your reservation.