Your hospital unit utilizes medical grade battery powered Cybernet All-in-One (AIO) PCs. This device is both the monitor and computer with the RFID integrated and can be wiped down using the approved sanitizer wipes provided by the hospital. Each AIO comes with 3 batteries and 1 charging station with 2 extra batteries. The charging stations will be found in a designated non-patient care area within your department.
Please review the information below to familiarize yourself with the device and how to maintain the batteries.
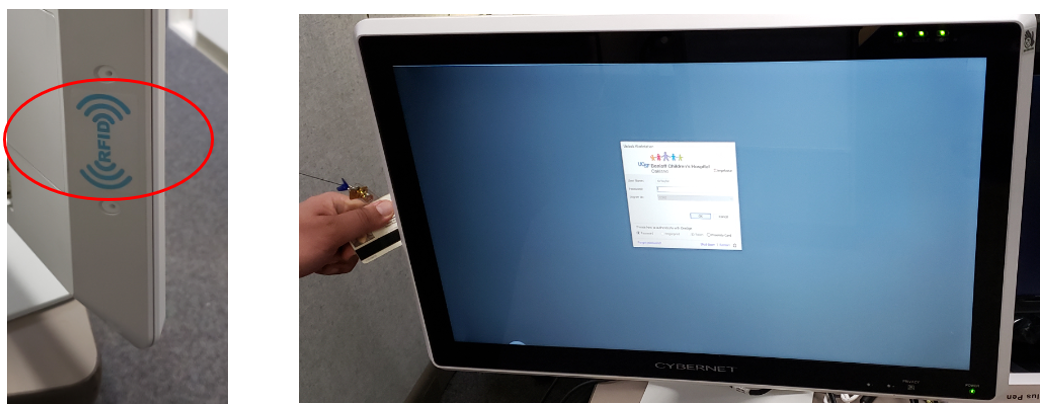
Badge reader for Tap & Go login
The badge reader is built into the monitor on this AIO. It is located on the left side. If you look behind the monitor, you will see a blue “RFID” sticker - that is where the badge reader is located. The easiest way to swipe is to put your badge halfway up the left side of the monitor and slide down until you hear the beep.
Batteries
- The battery bank on this WOW is located on the back of the AIO, near the top, with room for three (3) batteries.
- The AIO can be powered with only one charged battery.
- Each battery has about a 4-hour battery life.
- Three little lights on the top right-hand side of the computer indicate the battery charge status.
- Green means the battery is good.
- Red means it should be swapped out.
- The batteries are used one at a time from left to right when looking at the bank of batteries from the back of the AIO.
- Opening the doors to access the batteries disconnects the battery!
- If the battery door is left open, the computer will not use that battery and will move on to the next one in line.
- If all three doors are opened at the same time, the computer will shut down, even if all the batteries are charged!
- When replacing batteries, open one door, swap the battery, close the door, and then move on to the next one in line.
To replace a battery, pull the door forward to open it, and you will see the battery with a little black tab on the top.
- Pull the black tab on the battery straight up and out.

Insert a charged battery into the now empty slot with the label side of the battery facing the FRONT of the PC.
- Be careful to put the battery in the correct way!
- Read the label on the battery itself if you are unsure.
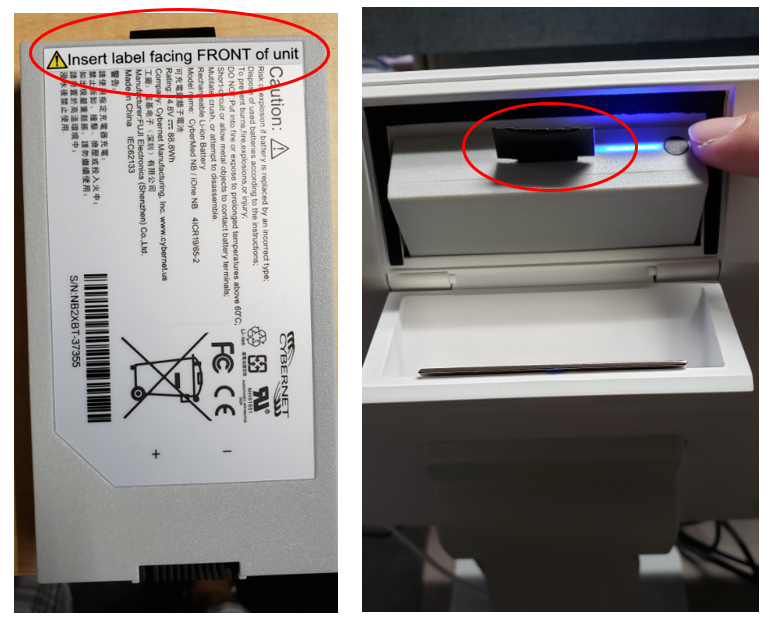
- To check the charge status of a battery in the charger, find the little button on the top near the black tab of each battery.
- Push the button, and a blue indicator will appear.
- The length of the solid blue light indicates battery life.
Charging Station
Be sure to insert the battery correctly into the charging station. The battery label should be facing toward the REAR of the charging unit.
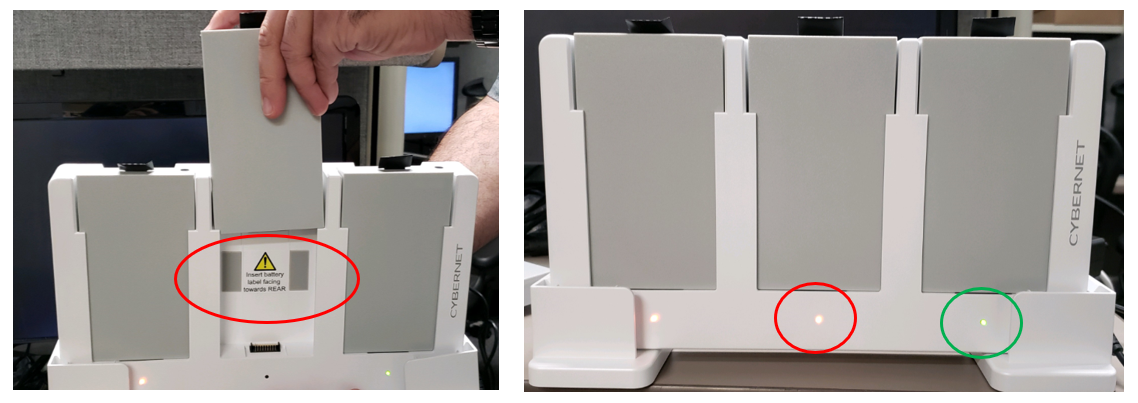
- Lights below the battery indicate the battery charge status.
— Green means the battery is fully charged and ready for use.
— Red means the battery is not yet fully charged.
Tips and best practices to ensure your batteries live up to their full potential
- Minimize exposure to high or low temperatures especially when charging (Ideal ambient temperature for usage and storage is from 60°F - 85°F).
- Minimize time spent at full charge and zero charge.
- Do not connect the AC power for more than 4 days straight with the battery fully charged.
- Do not let the battery fully drain before charging.
If you're storing the batteries
- Keep batteries in their original package.
- Fully charge before storing the batteries.
- For long-term storage, charge the batteries every 3 months.