Overview
This article contains instructions on how to renew or restore our Jamf Pro (MDM) enrollment on your UCSF-managed Mac when prompted to do so.
Overview
MDM (Mobile Device Management) profiles, which are used to manage many Apple devices at UCSF, typically expire every two years. We use an MDM solution called Jamf Pro for enrolling and managing Macs at UCSF. When an MDM profile expires, it can prevent the device from communicating with our MDM servers and receiving new configurations or commands. This can impact device management functionalities like deploying security profiles, managing secure Wi-Fi, and managing device encryption with automated validation. MDM profile renewals are typically automated but when that fails, manual renewal is required, which is what these instructions are for.
The following are instructions on how to manually renew the MDM Profile on your UCSF-managed Mac to help maintain your computer's ongoing compliance with UCSF's security standards. If you are a user outside of IT, you may contact your UCSF IT support team for guidance in running this action or visit https://help.ucsf.edu to request to be assigned to one of our IT support staff to assist you.
BigFix prompted to take action
If this message from BigFix, such as in the example shown below, appears, clicking Take Action simply opens this webpage of instructions for steps to follow.
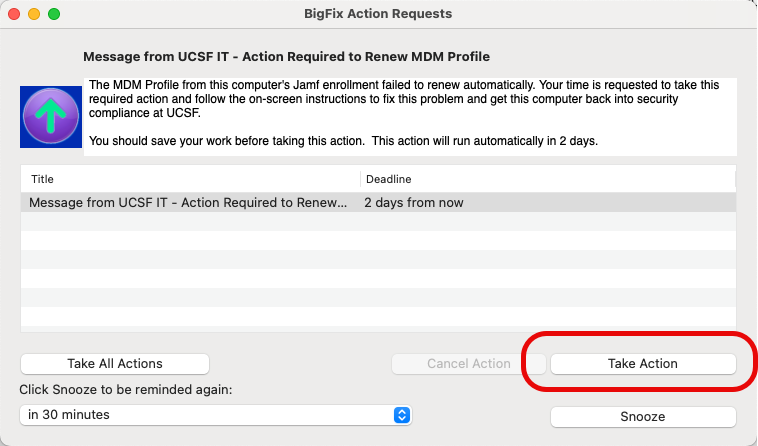
- Review these instructions, then follow the next steps below to run this process manually.
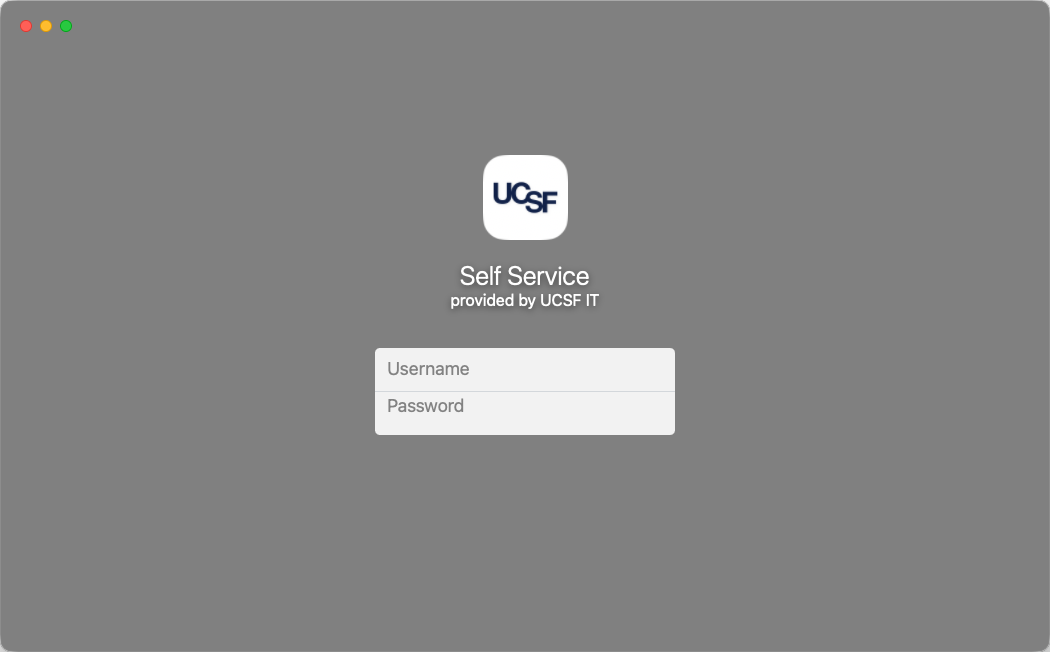
Running this fix manually using Jamf Self Service
Open Self Service+.app that is located in the Applications folder.
If you see this prompt shown below, click Open System Settings, then close it right away because there is no MDM Profile to approve at this time. If this message still shows, just click Open System Settings again and it should take you back to Self Service.

Find the item labeled Fix Jamf Pro Enrollment, then click Run.
NOTE: If this item isn't found in Self Service for your computer, you will need to follow a different series of instructions. Learn more about about the alternate approach to fix this issue. If you need assistance with navigating this process, reach out to UCSF IT support.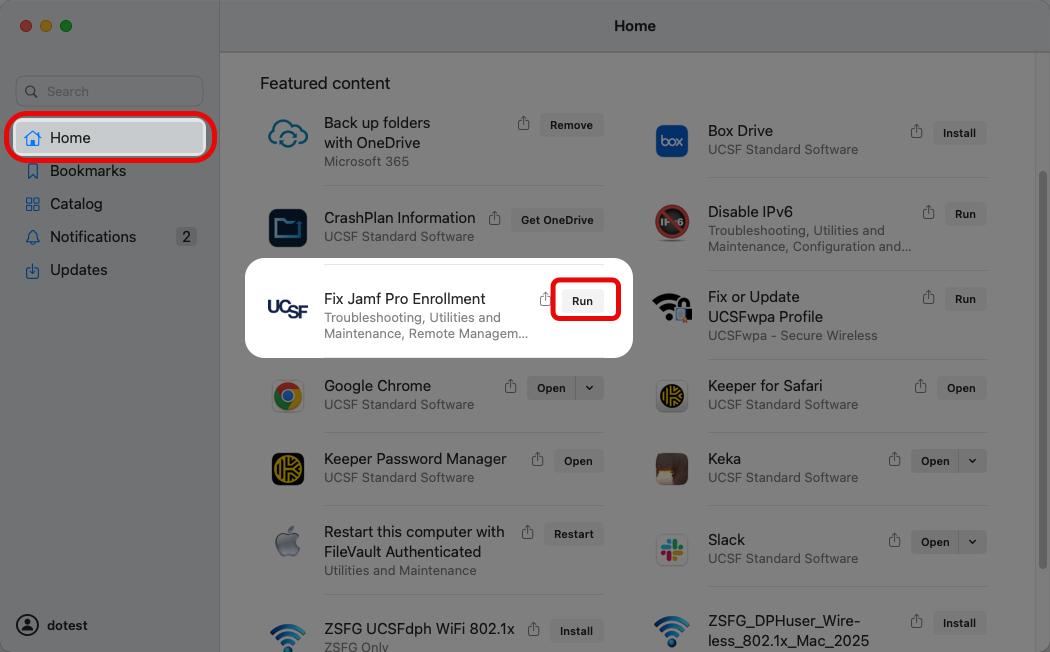
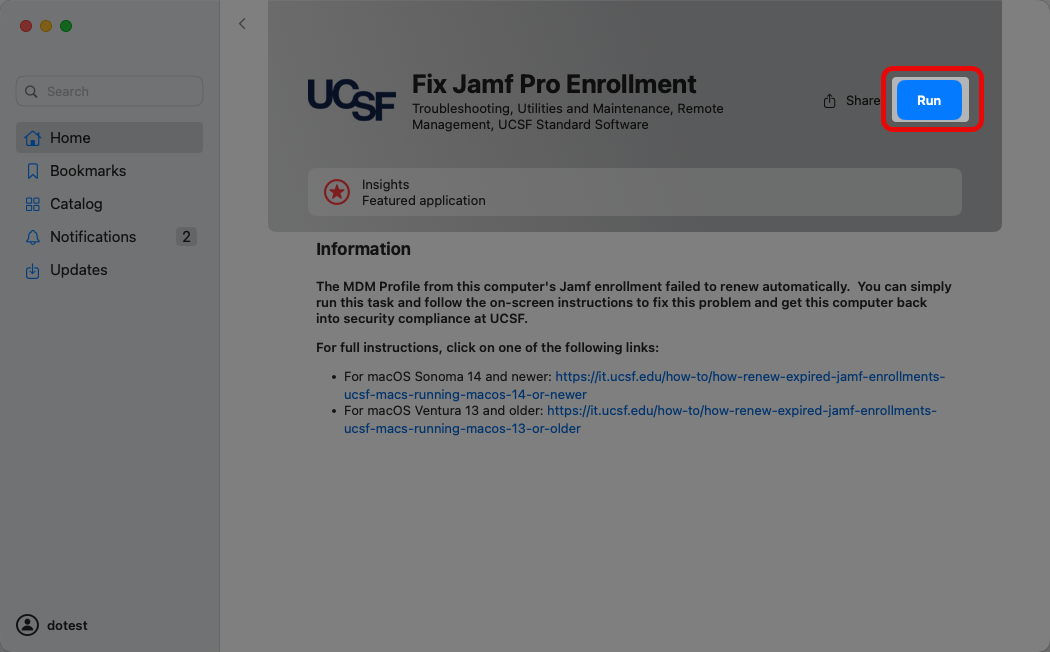
Click Run again to acknowledge that you have read and understood the description and begin running the actual task by following additional steps below.
Restoring Remote Management for UCSF Security Software
Look for this pop-up notification on the upper-right corner of the computer's screen. If it shows, hover your mouse cursor over it, then click Options and select Details.


A dialog window labeled with Allow Device Enrollment should appear momentarily. When it does, as shown below, click Allow.

Enter your computer's password when prompted to do so, then click Enroll.

When this window below appears, authenticate using your UCSF email address and email password.
NOTE: IT staff may also authenticate using their elevated AD username and password if the computer is not with the user, then follow up with Desktop Engineering to help re-assign the computer in Jamf back to the user's record.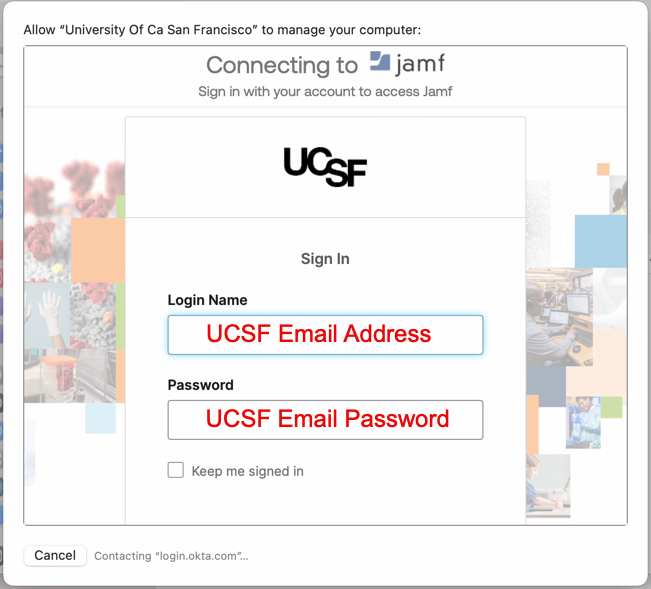
If the Duo setup screen appears, click Set up.

If prompted with a 4-digit code, such as what is shown in the example below, enter that on your Duo mobile app.

If prompted asking if this is your device, respond to it appropriately.

If the above step is successful, it will show this status window for a moment:

When this window appears, click Continue.

Wait while your computer downloads and installs a new enrollment profile from our Jamf Pro server, which can take at least one minute to complete.

When the MDM Profile re-installs successfully, your computer is actively enrolled back to our device management system again. You will notice that our device management system will re-install a variety of configuration profiles that are necessary for staying in compliance with UCSF's security standards for electronic information resources.

It is strongly recommended to allow at least 1 minute for your computer to re-synchronize with our management system to ensure that your computer's device encryption, security software extensions, and the network content filters are properly re-managed to ensure your computer is current with UCSF's security standards for electronic information resources. You may then resume your normal work activities on your computer.