To open Jamf Self Service on Macs enrolled in Jamf Pro at UCSF
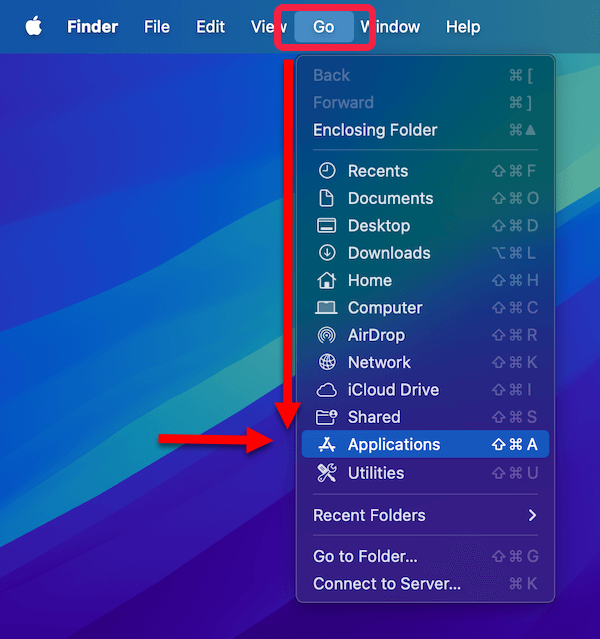
Open the Applications folder, which you can do by going to the Desktop (Finder), click Go on the menu bar, scroll down, and select Applications.
Find and open Self Service.app or Self Service+.app by double-clicking it.
(Note: Depending on your computer settings, the ".app" suffix may not be showing on your screen.)
If neither Self Service nor Self Service+ is found in your Applications folder and you're sure your Mac was properly enrolled at UCSF, check your Utilities folder, as older versions of Self Service are installed there.
Log in with your AD username and AD password
Do not include the domain in your username. For example, if your AD account is Campus\JDoe or UCSFMC\SmithJ, then use JDoe or SmithJ and leave out "Campus\" and "UCSFMC\".
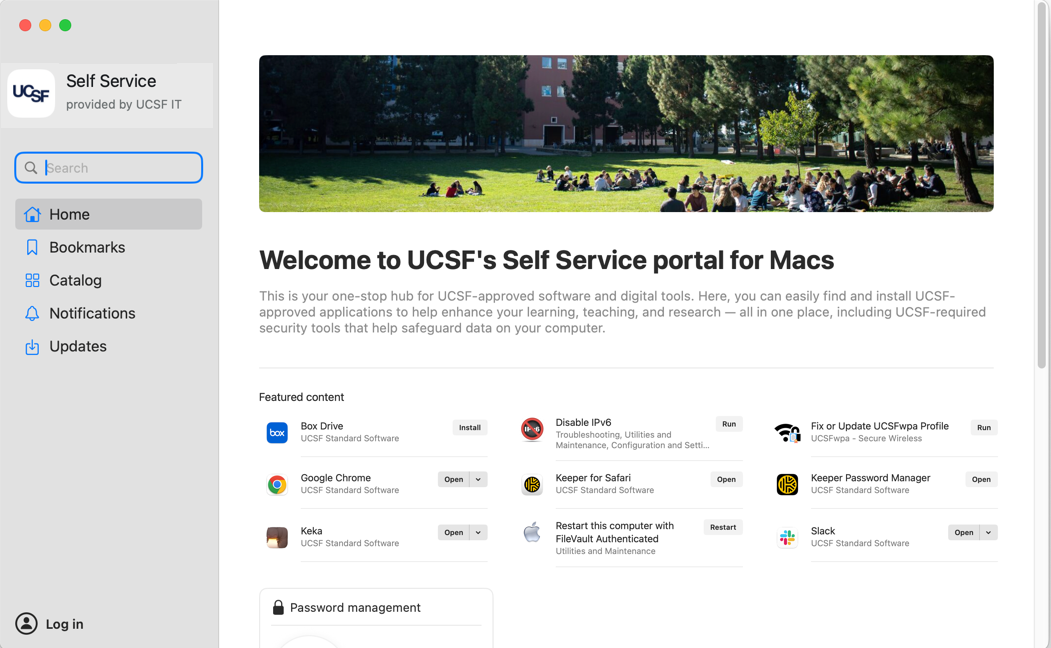
Upon successful login to Self Service, you will be presented with our Self Service screen similar to this one below:
If you need technical assistance or guidance with using our Self Service app on your Mac, please reach out to us by visiting our website at https://help.ucsf.edu, select Submit a Ticket, and fill out the form to submit for one of our IT staff to contact you.
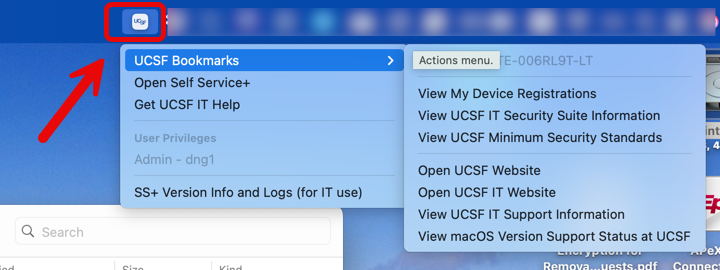
Additional information about the new menu bar icon
On Macs running macOS Ventura (13.x) and newer versions, you may notice a new menu icon on your computer, including BYOD computers, that has our UCSF logo in it and was part of the recent upgrade of our Jamf Pro server. We are working with our software vendor of Jamf Pro to develop an option that allows us to either disable this icon or let users decide when to show or hide this menu icon as a preference setting on their computers. Until then, it is currently an "always on" feature similar to our other security tools.